
Author: zeeshan@advantage-services.com

The Silent Threat: How to Detect and Prevent Hidden Water Leaks

While your family sleeps at night, water damage could be spreading beneath your flooring and behind your appliances. Inside your walls, creeping water damage could be growing as mold blossoms. 

Unfortunately, this type of situation is incredibly common in American homes. When homeowners don’t detect water leaks early, they can transform into expensive repairs, extensive mold growth, wasted water, and serious structural damage.

To avoid leaks and water damage, we’ve compiled a guide on how to detect water leaks early and prevent them from happening. We’ll look at the common locations, frequent warning signs, and when you should reach out to a professional.

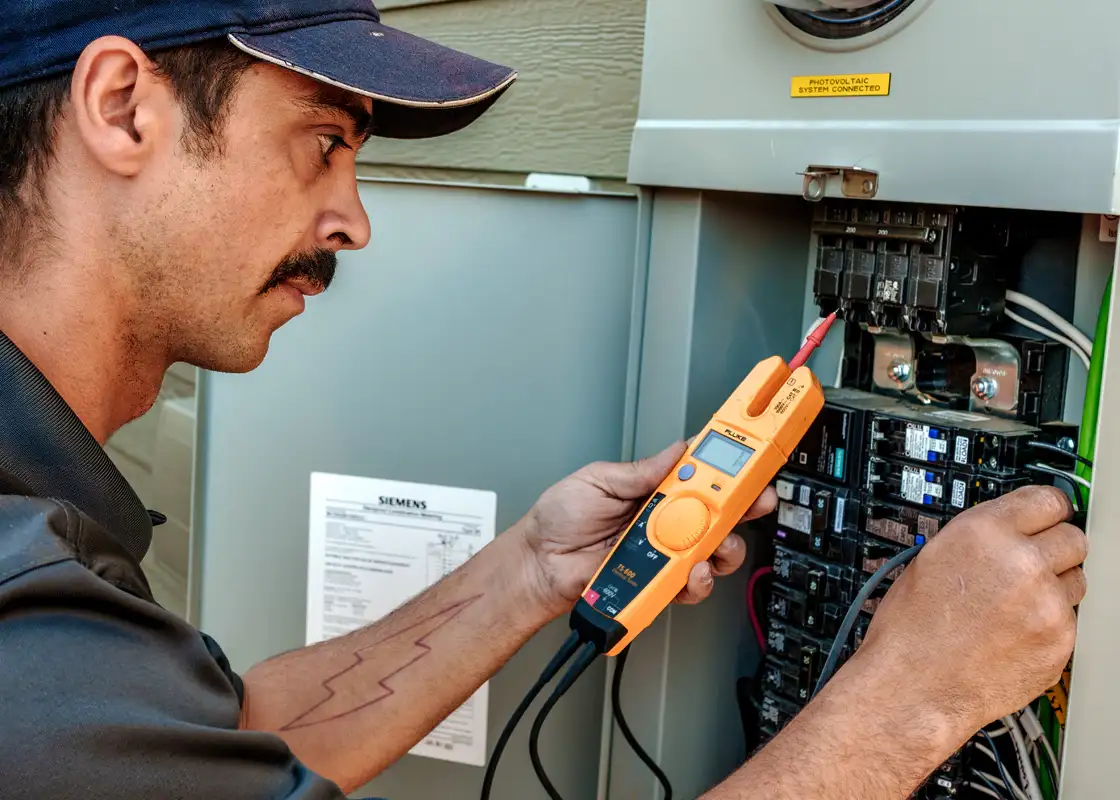
For professional inspections and high-quality repairs, reach out to your trusted local experts at Elkhorn Heating, Air Conditioning, Plumbing & Electrical.

Why Hidden Water Leaks Are So Dangerous 

Hidden leaks will never remain hidden for long. Over time, they can lead to the following issues.

  • Extensive Damage: A small leak can cause extensive damage to your drywall, ceilings, insulation, and flooring.
  • Mold and Mildew: Whenever water is present, it can result in mold growth. Besides causing damage, this can cause health problems for your home’s occupants.
  • Skyrocketing Water Bills: A leak uses extra water, which can quickly add up to thousands of gallons of water over the course of a year.
  • Structural Integrity: Long-term water damage can harm the structure of your home.
  • Pest Infestations: If you have damp, dark spaces, it can attract cockroaches and termites to your home. 

Common Locations for Hidden Water Leaks 

To detect water leaks, check the following common locations. 

  • Behind Walls: Look for leaky pipes behind your bathroom, kitchen, and laundry room walls.
  • Under Floors: Slab leaks and leaks under your floors can be challenging to see because of their location.
  • Attics and Ceilings: Faulty HVAC condensate lines, plumbing problems, and leaky roofs can cause ceiling stains. 
  • Basements and Crawlspaces: These areas can develop leaks due to main water lines, sump pump discharge lines, water heaters, and washing machine hoses.
  • Near Appliances: You may experience leaks near your water heater, washing machine, dishwasher, ice maker line, and other appliances that use water.
  • Outdoors and Underground: Leaks can occur in your main water line and sprinkler system.

Key Warning Signs to Help Detect Water Leaks 

There are a few common indications that you may have a water leak. If you are uncertain, reach out to our team of licensed plumbers for a professional inspection.

Unexplained Spike in Water Bill

Often, a spike in your water bill is the first sign of a leak. If your water bill is significantly different from what it was during the same month last year, you need to schedule an inspection.

Visible Water Stains, Discoloration, or Peeling Paint

Pay attention to yellow, brown, or dark spots on your walls, ceilings, and floors. Additionally, pay attention to cracking, bubbling, or peeling paint or wallpaper.

Musty Odors or Mold Growth

Dampness or mold odors are a sign that hidden moisture is present. You may also notice black or green mold spots on your baseboards and walls.

Changes in Flooring

If your flooring warps or tiles become loose, it may be due to water leaks.

Reduced Water Pressure

A sudden decline in your water pressure could mean that there is a leak in your home’s main supply line.

Sound of Running Water When No Fixtures Are On

If you hear the sound of running or dripping water when every appliance and faucet is off, there may be a leak.

Foundation Cracks or Shifting

A shifting foundation and foundation cracks can occur if slab leaks make your home settle unevenly.

Warm Spots on Floors

A leak in a hot water pipe can cause a warm area to develop on your floor.

DIY Methods To Detect Water Leaks 

If you think that your home may have a leak, there are a few leak detection tips you can use to find and confirm the leak.

The Water Meter Test

For this method, you should turn off every appliance and faucet in your home that uses water. Then, check the reading on your water meter. In 30 minutes, check the meter again. If the number has changed, you likely have a leak.

Toilet Dye Test

To see if your flapper valve is leaking, add a few drops of food coloring to your toilet tank. Wait 15 to 30 minutes. If any colored water appears in the toilet bowl, you need to replace the flapper valve.

Exterior Inspection

For underground and slab leaks, walk around the outside of your home. Pay attention to lush patches of grass, wet areas, and depressions in your yard.

Visual Appliance Check

You can also visually check out your washing machine, ice maker, water heater, and dishwasher for corrosion, puddles, and any signs of moisture.

Professional Leak Detection & Repair 

You should reach out to Elkhorn if you have a leak you can’t repair. In particular, give us a call for slab, sewer line, and main water line leaks. We can help you diagnose the underlying cause of mold growth and repair complex leaks.

At Elkhorn, we assist homeowners in the Denver metro area through the following tools and techniques.

  • Acoustic Leak Detectors: Our leak detectors can hear the sound of leaks underground and inside of walls.
  • Thermal Imaging Cameras: These cameras reveal hidden sources of moisture by detecting the temperature differences caused by water.
  • Video Camera Inspections: Our video cameras can look inside of water pipes and sewer lines to find leaks.
  • Pressure Testing: These tools allow us to pinpoint leaks by checking water pressure in specific sections of plumbing.

Once we’ve pinpointed the leak, we can perform specialized repairs, such as re-piping services, slab leak repairs, and main water line replacements. Then, we can recommend the best techniques for preventing leaks in the future. Thanks to our cutting-edge technology, our licensed plumbers can deliver lasting solutions for your home.

Prevention Strategies: Minimizing Your Risk 

To prevent future leaks from happening, we recommend performing the following leak prevention strategies.

  • Schedule regular plumbing maintenance with our professional plumbers.
  • Insulate pipes in unheated areas.
  • Replace your old or worn-out appliance hoses.
  • Pay attention to sudden spikes in your water bills.

Repair Your Hidden Water Leaks

While hidden water leaks pose a major threat to your home, you can detect water leaks by being vigilant and proactive. If you notice any signs of a leak, reach out to Elkhorn Heating, Air Conditioning, Plumbing & Electrical immediately for a professional inspection and repairs in the Denver metro area.

Call today to protect your home from water damage!

Why Are My Circuit Breakers Tripping?

When you’re in the middle of an amazing Netflix series or about to defeat the final boss, nothing is worse than having a circuit breaker trip. While a circuit breaker tripping is annoying, it’s a vital safety feature. To resolve this problem, there are a few troubleshooting tips you can use. 

If basic troubleshooting doesn’t work, it’s important to reach out to Elkhorn Heating, Air Conditioning, Plumbing & Electrical for help. We can diagnose and resolve the electrical problem quickly, so you don’t have to deal with a dangerous electrical hazard.

Understanding Your Circuit Breaker: A Safety Essential 

Before diving into troubleshooting tips, we’ll look at what circuit breakers are and how they work.

What Is a Circuit Breaker?

A circuit breaker is like an automatic safety switch. If there are fluctuations in the power supply, the circuit breaker flips to protect your electrical system from damage. 

In the past, homes often used fuses instead of breakers. Instead of tripping, fuses would blow and then need replacement. While there wasn’t anything inherently dangerous about fuses, the problem was that many people would use pennies or other conductive materials instead of replacing the fuse. This essentially removed the fuse’s safety protection, which is why circuit breakers are now used instead.

How It Works

Normally, electricity flows into your home through the circuit breaker panel. If there is an unsafe condition or too much current, the breaker trips and shuts off the power. This stops the wires from overheating and causing a fire. It also prevents electrical damage to your household appliances.

How To Reset a Tripped Breaker

When you experience circuit breakers tripping, the first step is to find your electrical panel to locate the tripped breaker. It will generally be halfway between the on and off positions or completely off. Then, turn the switch entirely off. Afterward, turn it to the on position. If it immediately trips again, it means that there is an underlying issue that needs to be addressed.

Common Reasons Why Your Circuit Breakers Trip (and Solutions!)

There are a few reasons why a circuit breaker might trip. Depending on the root cause, the troubleshooting steps can vary.

Circuit Overload: The Most Common Cause

This is generally the most common cause. If you have many high-powered devices drawing excessive power, it can trip the breaker. For example, you might be running the coffee maker, toaster, and microwave off of a single circuit while you’re making breakfast.

The easiest solution is to overload some of the extra devices that are plugged in. When you have high-draw appliances, like microwaves and space heaters, plug them into different circuits. 

You may also want to “have dedicated circuits installed for high-powered appliances, like washers, dryers, dishwashers, and ovens. However, this cannot be handled on your own. For new circuits or an electrical panel upgrade, reach out to our expert electricians.

Short Circuit

A short circuit occurs when a hot wire touches a neutral wire or another hot wire. This causes electricity to surge with very low resistance. Often, short circuits happen when there is loose wiring in the switch or outlet. Faulty appliance wiring and frayed cords can also cause short circuits. If this is the problem, you may notice sparks, popping noises, or a burning odor.

Short circuits are not a DIY repair. Immediately unplug all devices from the affected circuit. Check the cords for signs of damage. If there is damage present, the appliances must be disposed of or repaired by a professional. No matter what, you should never fix internal wiring problems on your own.

Ground Fault

A ground fault happens when a hot wire touches a ground wire or grounded surface. This may occur when water or moisture is present. For example, bathrooms, kitchens, and outdoor areas are more likely to have ground faults. Additionally, this can happen if the wiring has damaged insulation.

You can prevent ground faults by installing ground fault circuit interrupters (GFCIs). These outlets are designed to detect faults and trip so that electrical damage and electrocutions don’t happen. Typically, they are installed in bathrooms, kitchens, and areas where moisture is present.   

If you do have a ground fault, start by unplugging any device that is connected to the circuit or GFCI outlet. Look for signs of moisture around the outlet. If the breaker trips after you plug it in, there may be an issue with the wiring or a different underlying problem. In either case, you should have it checked out by a professional. Persistent ground faults represent a serious shock hazard, so they should be fixed by an experienced electrician.

Faulty Circuit Breaker

Over time, circuit breakers can sometimes wear out. If you have a defective or faulty circuit breaker, it may no longer be able to carry its normal electrical load. You may notice that it feels loose or appears discolored. Alternatively, the breaker may trip without an obvious cause. 

If you have managed to rule out all of the other problems, a malfunctioning breaker could be the cause. However, this isn’t an issue you can handle on your own. To ensure the safety of your family and home, you should get the breaker diagnosed and replaced by a trusted electrician.

Wiring Issues in Your Home

Finally, frequently tripped breakers may be connected to wiring issues inside your home. When you have old, damaged, or incorrectly installed wiring, breakers can trip frequently. This may happen due to loose connections, rodent damage, or nails piercing the wires. In older homes that have knob-and-tube or aluminum wiring, insulation often deteriorates and causes tripped breakers.

All of these wiring issues are serious electrical hazards that should be handled by a qualified electrician. Depending on the cause, you may need partial or whole-house rewiring.

When To Call a Professional Electrician 

You should always call for professional help in the following circumstances.

  • Your breakers keep tripping after you’ve tried basic DIY troubleshooting.
  • The breaker trips as soon as you reset it.
  • You smell something burning, notice sparks, or have a discolored outlet.
  • The electrical system is made of knob-and-tube wiring, fuse boxes, or aluminum wiring.
  • You need to do repairs that are more complex and dangerous.

Get Faulty Circuit Breakers Diagnosed Today

While circuit breakers tripping can be annoying to deal with, it’s an important safety feature. By learning the most common causes and the best solutions for each cause, you can know when to call for help. 

Never ignore the warning signs of a potential electrical danger. Reach out to Elkhorn Heating, Air Conditioning, Plumbing & Electrical today for a reliable diagnosis and safe repairs.

Ductless Mini-Split Maintenance: 5 Simple Tips to Keep Your System Running Efficiently

Getting ductless mini-splits isn’t just a way to enjoy a more comfortable home. It’s also an investment in your future. These high-performance units boast excellent energy efficiency, quiet operation, and customizable comfort. Unlike central ACs, you also don’t need to mess around with ductwork installation and maintenance. 

However, even the best unit will still need ductless mini-split maintenance to stay functional. With the best mini-split maintenance tips and routine tune-ups, you can ensure peak performance and energy efficiency.

At Elkhorn Heating, Air Conditioning, Plumbing & Electrical, we are the trusted local experts for HVAC services. From ductless mini-split repairs to routine maintenance, we offer leading services to homeowners in the Denver area.

1. Clean or Replace Your Air Filters Regularly 

One of the most important things you can do to protect your unit’s energy efficiency and prevent future repairs is to change the air filter. A dirty filter can reduce airflow, forcing your ductless mini-splits to work harder to achieve the same temperature. Typically, we recommend cleaning or replacing the air filter every 30 to 90 days. You can check with the unit’s manufacturer to see the specific timeline for your HVAC unit. 

An air filter is responsible for trapping pet dander, dust, and pollen before they can damage the unit’s internal components. If you have allergies or pets, you should change the air filter more frequently. 

To learn how to clean a mini-split filter, use the following steps.

  • Turn off the ductless mini-split unit.
  • Find the filter panel. On most units, it will be on the front of the indoor unit. 
  • Then, remove the filter. You can wash it with warm, soapy water if it is a washable filter. For other filter types, a vacuum cleaner will remove the dust and contaminants effectively.
  • Let the filter dry out completely before you put it back into the unit.

2. Keep the Indoor Unit’s Coils and Vanes Clean 

Another one of the most important mini-split maintenance tips is to clean the indoor unit’s coils and vanes. The evaporator coil is where heat and humidity are absorbed by the refrigerant. Then, the refrigerant is transferred outside to cool your space. If the evaporator coils aren’t working properly, it can cause the coils to freeze. At the very least, your unit will have to work harder, resulting in a higher energy bill each month.

As a part of your ductless mini-split maintenance, remember to perform the following steps.

  • For your safety, turn off the power to the unit before doing any maintenance work.
  • Then, open the front panel of your indoor unit.
  • With the help of a soft brush or a specialized fin comb, start to clean the evaporator coil’s delicate fins. 
  • Afterward, gently wipe down the fan and the adjustable louvers (vanes) using a damp cloth. Be mindful of your fingers so that you don’t accidentally get cut.
  • For best results, do a basic cleaning of the evaporator coil and vanes every few months. Once a year, you or one of our HVAC technicians should do a full deep clean.

3. Keep the Outdoor Unit Clear of Debris 

As a part of your DIY mini-split maintenance, you should clean around your outdoor compressor unit. For this unit to function at its best, the airflow can’t be obstructed. Weeds, grass clippings, and other debris should be removed. Otherwise, the unit will end up struggling to release and absorb heat. 

Ideally, you should perform these steps each season before the weather changes. 

  • Make sure your unit is turned off.
  • Clear away dirt, leaves, weeds, yard waste, and other items that are within a two-foot radius of the unit. 
  • Hose down the unit’s exterior fins to get rid of any stubborn dirt.

4. Check the Condensate Drain Line 

Your ductless mini-splits are responsible for more than just cooling the inside of your home. They are also in charge of removing a significant amount of moisture from the air. Then, this moisture is transferred away from your home with the help of the condensate drain line. 

Over time, the condensate drain line can sometimes become clogged. Mold, debris, and insects can block the tube and prevent water from exiting your home. When this happens, you may notice leaking from your indoor unit. Left untreated, this can cause mold growth and extensive water damage.

To care for your ductless mini-splits, carry out the following steps at least once per year.

  • Find your condensate drain line. It will generally be a plastic tube that comes out of your indoor unit. 
  • Inspect the tube for any visible debris or blockages.
  • If you believe that there is a clog, buy distilled white vinegar. Pour a cup of the vinegar down the drain line to stop algae and mold from growing.

5. Schedule a Professional Tune-Up with Elkhorn

The energy used to heat and cool homes makes up more than half of all energy consumed by residential homes. In order to save money on your energy costs and prevent untimely repairs, it’s essential to schedule a ductless mini-split tune-up.

Our professional HVAC technicians can boost the long-term performance of your ductless mini-split system in a few important ways. 

  • Inspection: First, we’ll perform a thorough inspection and deep cleaning.
  • Refrigerant: Then, we will check your refrigerant levels. If they are low, we can recharge your unit.
  • Electrical Connections: Next, we will inspect all of the electrical connections to make sure they are safe and performing at their best.
  • Testing: Before we leave, we’ll perform tests to ensure that your unit is running efficiently. 

Throughout the process, we will pay attention to signs of minor issues. By fixing these problems early, we can prevent them from escalating into major issues.

Typically, we recommend scheduling at least one tune-up per year. For the best results, we schedule fall and spring maintenance tune-ups so that local homes are ready for the peak heating and cooling seasons.

Schedule Your Next Maintenance Tune-Up

The best mini-split maintenance tips can help your system function efficiently throughout the year. For the best level of comfort and performance, it’s essential to schedule your routine maintenance service with our experienced HVAC providers. By being proactive about your maintenance and repairs, you can save on energy bills in the present and avoid costly breakdowns in the future.

Book your ductless mini-split maintenance by giving us a call today.