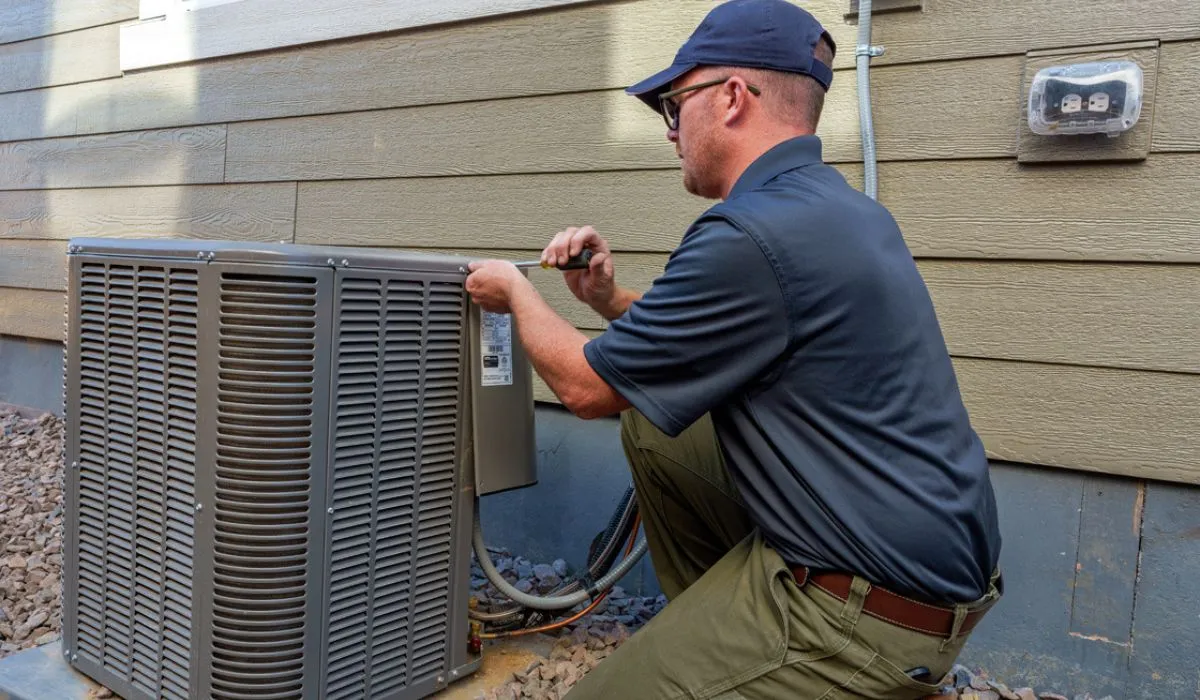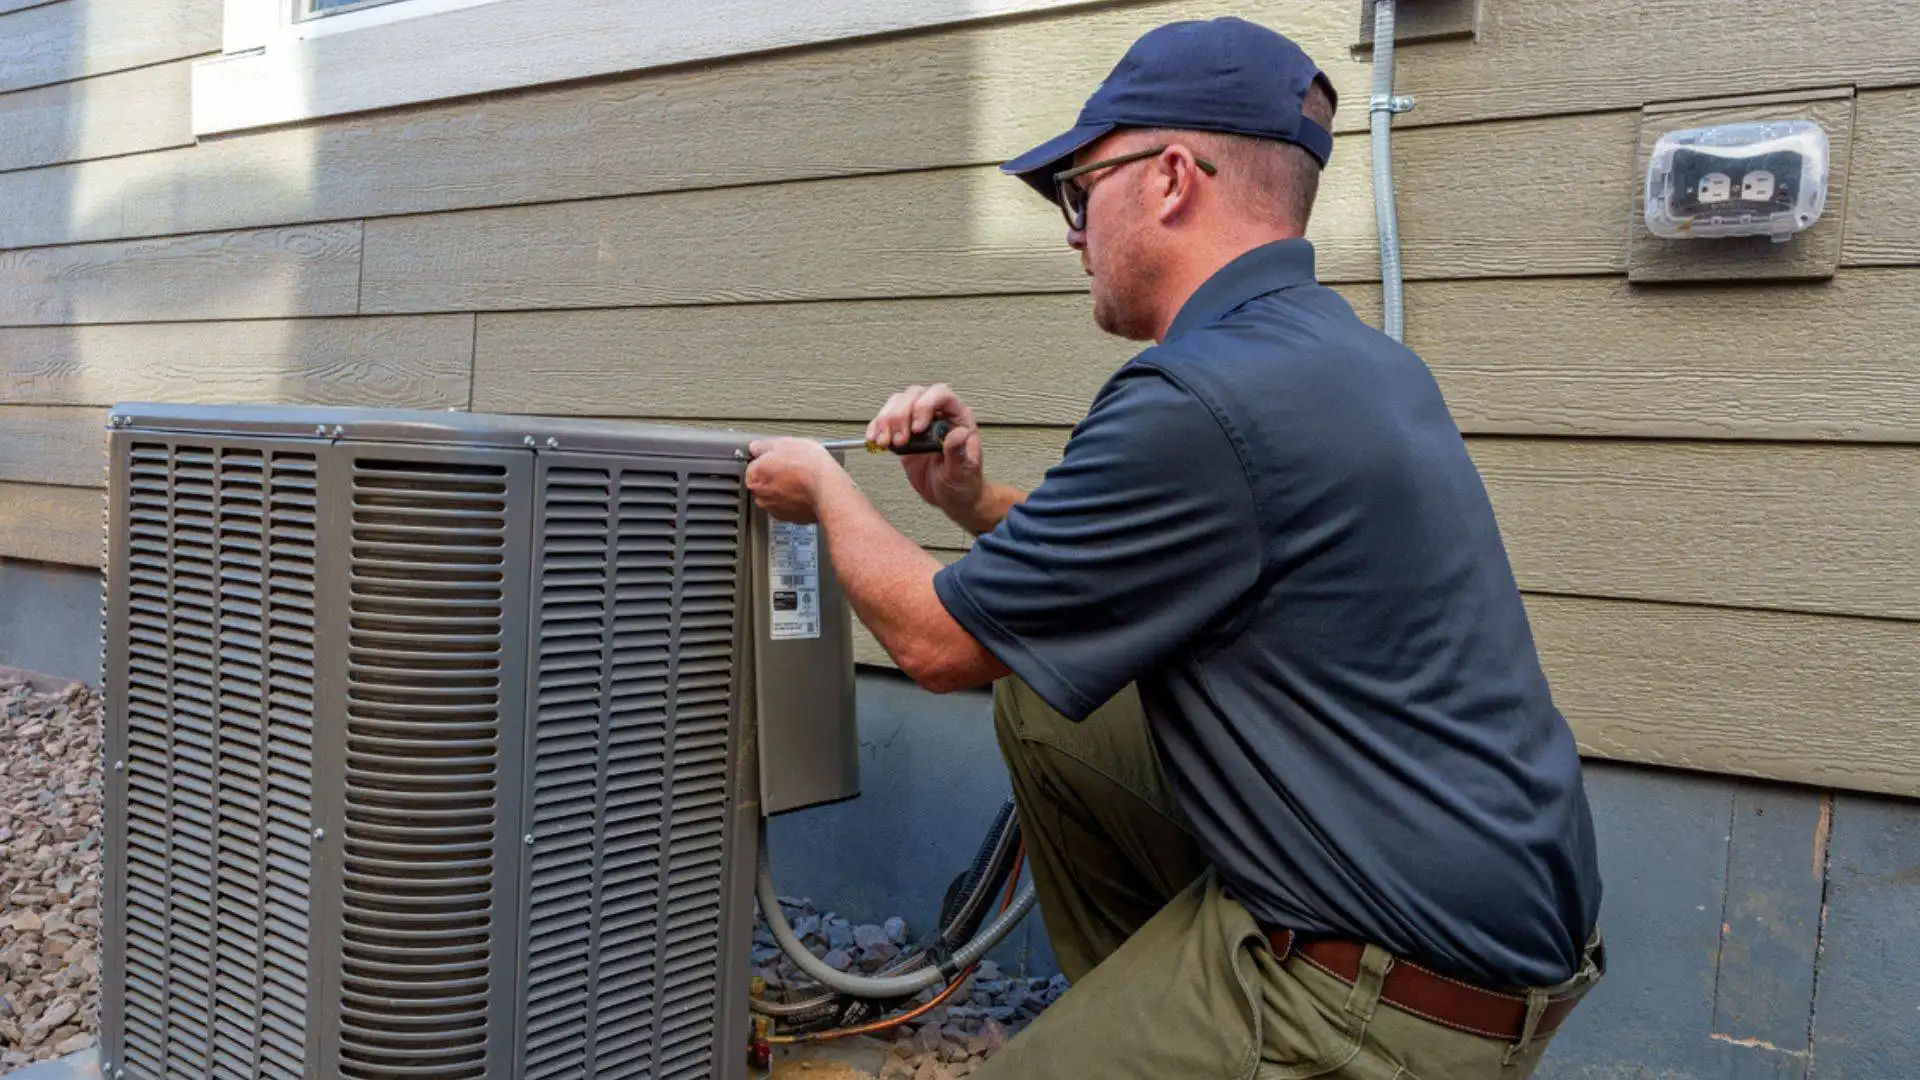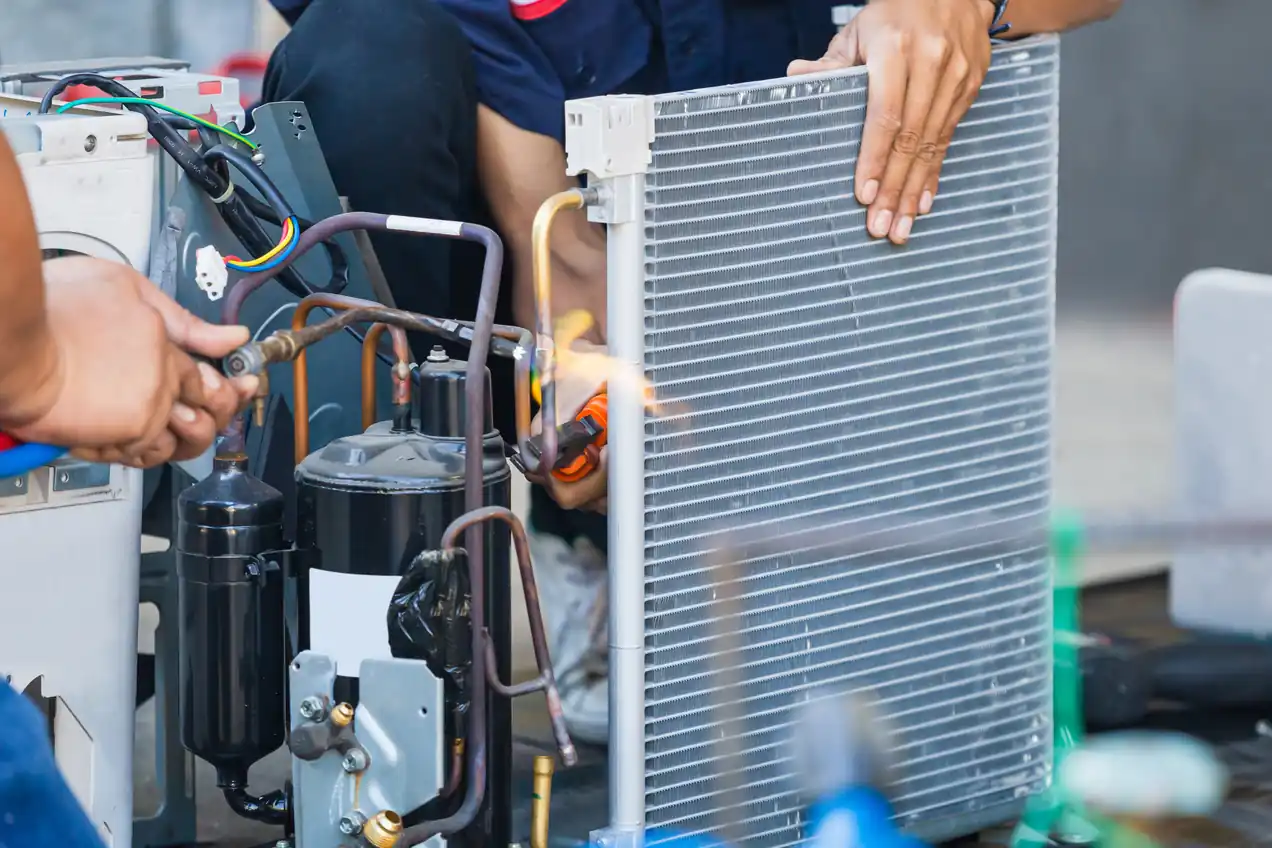
Technician repairing an AC condenser in Denver home.

Condenser Fan Motor Troubleshooting: Why It’s Not Working and What To Check

A loud buzzing sound outside can inspire panic on a hot summer day. While unexpected noises might be unnerving, they can be fixed. Through condenser fan motor troubleshooting, Elkhorn Heating, Air Conditioning, Plumbing & Electrical can help you diagnose and repair the source of the problem.

What Does a Condenser Fan Motor Do?

The condenser fan motor is responsible for powering the fan in your outdoor unit. When the fan turns, it pulls air through the unit and runs the air over your condenser coils. This cools the refrigerant gas in the coils so that the refrigerant can go back into your house for another cycle.

Signs Your Condenser Fan Motor May Not Be Working

If you notice the following, it may mean your condenser fan motor is not working.

  • Unusual Sounds: There are loud buzzing or grinding noises coming from your outdoor unit.
  • Short Cycling: The system short-cycles to prevent overheating due to the fan not working.
  • Burning Smells: If you notice a burning odor, the motor’s electrical windings may be starting to overheat.
  • No Spinning: When the motor isn’t running properly, you may notice the fan stops spinning. If it does spin at all, it may move slowly.
  • Warm Air: A faulty motor means the fan isn’t moving properly. Because this prevents the refrigerant from cooling properly before continuing through the system, you may notice that your AC is blowing warm air through your vents.
  • Tripped Breakers: If a malfunctioning motor is drawing extra current, it can cause the breaker to trip repeatedly.

Common Causes of Condenser Fan Motor Problems

If your outdoor AC unit fan stopped working because of a faulty fan motor, there could be a few different problems at fault. To avoid the same problem in the future, it’s important to understand why your condenser fan stopped working.

Age and Normal Wear

The average lifespan of an AC ranges between 10 and 20 years. As the unit reaches the end of its lifespan, it will develop more frequent issues.

Poor Maintenance

Routine maintenance is essential for extending the lifespan of your AC and helping it avoid unexpected HVAC failure. During an AC tune-up, the technician inspects for signs of a problem, cleans components, lubricates moving parts, and tests the system’s performance. By identifying problems before they escalate, the technician can help you avoid more expensive repairs in the future.

Debris Buildup

Grass clippings, leaves, and other debris can end up clogging your fan motor and other components in your outdoor unit and cause increased resistance. This is why it is so important to regularly clean around the outdoor AC unit.

Electrical Issues

Whenever there is a power surge, electrical spike, or wiring issue, it strains your fan motor. Eventually, this can lead to a premature breakdown.

Corrosion

Because your unit is outdoors, it will be exposed to rain, snow, and humidity. Over time, this can cause your motor components and electrical connections to become corroded.

Condenser Fan Motor Troubleshooting Steps Homeowners Can Try

If you’re experiencing problems, the right condenser fan motor troubleshooting can help. While more complex repairs and maintenance tasks should be left to the professionals, you can try the following tips on your own.

  • Remove Debris: To do this safely, turn off the power at the circuit breaker. Then, remove any debris that is blocking the fan. At the same time, you can also inspect for signs of overheating, loose wires, or burning odors. If you notice these symptoms, call for help and do not try to repair them on your own.
  • Test the Blade: While the fan is still off, use a stick to try nudging the blade. If the blade doesn’t move or is quite stiff, the motor bearings may be seized. Meanwhile, a fan that spins freely may indicate a failed capacitor or another electrical issue.
  • Check the Breaker and Disconnect Box: Verify that the disconnect box is properly engaged. Then, check the breaker to see if it has tripped. You can reset the breaker once. If it immediately trips again, there’s an underlying problem that needs to be addressed by a professional.

When To Call an HVAC Professional

You should reach out to our licensed HVAC technicians if your basic air conditioner fan troubleshooting doesn’t work. Additionally, call a professional immediately in the following circumstances.

  • There is a burning odor.
  • You hear grinding noises.
  • The breaker keeps tripping.
  • You believe the wiring is damaged or corroded.
  • Basic troubleshooting didn’t solve the problem.

Repair vs. Replace: What Makes the Most Sense?

If you encounter AC condenser fan problems, you’ll eventually need to decide whether to repair or replace the AC. One common HVAC rule of thumb is known as the $5,000 rule. Basically, if the repair cost multiplied by your unit’s age is over $5,000, then a replacement is the better choice. When the repair cost is less than $5,000, a condenser fan motor repair is likely the best course of action.

However, other factors also come into play. A relatively young AC with a minimal history of repairs will last years longer if it is repaired. In comparison, older units with frequent repairs and poor energy efficiency should likely be replaced.

How To Prevent Condenser Fan Motor Problems

Once you’ve resolved your AC condenser fan problems, there are a few things you can do to prevent them from recurring in the future.

  • Maintenance: We recommend performing a springtime tune-up before the cooling season arrives to prevent costly repairs, unexpected breakdowns, and declines in energy efficiency.
  • Outdoor Cleaning: Throughout the year, remove grass, debris, and any other items that are around the outdoor unit. This ensures proper airflow and helps you avoid unnecessary wear.
  • Condenser Coil Cleaning: To keep your unit operating at its best, the condenser coils should be cleaned as part of your routine maintenance. For your safety, always turn the unit off at the breaker before attempting to clean the coils.
  • Filter Changes: For proper airflow, you should replace your AC filter every 30 to 90 days.

Why Homeowners Trust Elkhorn Heating, Air Conditioning, Plumbing, & Electrical

Whether you’re looking for a condenser fan motor replacement or a basic tune-up, our team can help. Over the years, we’ve developed a reputation as Denver and Littleton’s leading source of HVAC support.

  • Problem Solvers: Until your problem is solved, our work isn’t complete.
  • Trusted Advisors: We provide honest expertise, so you can be confident about the quality of your results.
  • Customers for Life: Elkhorn is committed to building long-lasting relationships and making each client a customer for life.
  • Local Experts: Our experts are based in the Denver and Littleton area, so we understand what local residents need.
  • Same-Day Services: When your AC breaks down, you can’t afford to sweat it out. We offer same-day service for all of your HVAC repair needs.

For professional condenser fan motor troubleshooting and repairs, reach out to our HVAC technicians today.

Frequently Asked Questions About Condenser Fan Motors

Why is my AC condenser fan not spinning?

If your AC fan is not spinning, it may be due to debris blocking the fan’s movement, a faulty contactor, a failed capacitor, or a seized fan motor. Because many potential problems can cause this symptom, it’s essential to reach out to an HVAC expert for professional diagnostics.

Can a bad capacitor stop the fan motor from working?

Absolutely. The capacitor is responsible for providing a jolt of energy to get the fan motor moving. If the capacitor doesn’t work, the fan motor won’t turn on.

Is it dangerous to run the AC if the fan isn’t spinning?

Yes, it is. If your outdoor AC fan is not working, you should immediately turn your entire system off and call for HVAC repairs. Otherwise, you can cause compressor damage, overheating, and more costly repairs.

How much does a condenser fan motor repair cost?

It will depend on the brand, whether other repairs are needed, and any existing warranties. On average, a condenser fan motor that is still under warranty will cost between $100 and $300 to replace. Without a warranty, this repair generally costs between $200 and $700

Should I repair or replace my AC system?

It depends on the cost of the HVAC repairs, the age of the unit, the AC’s current performance level, and the presence of a warranty. Once your AC is over 10 years old or requires more frequent repairs, getting an AC replacement generally makes the most sense.

What causes condenser fan motors to fail?

Anything that strains the condenser fan motor can eventually cause it to fail. For example, environmental strain, electrical malfunctions, poor airflow, and normal wear can eventually cause your motor to stop working.
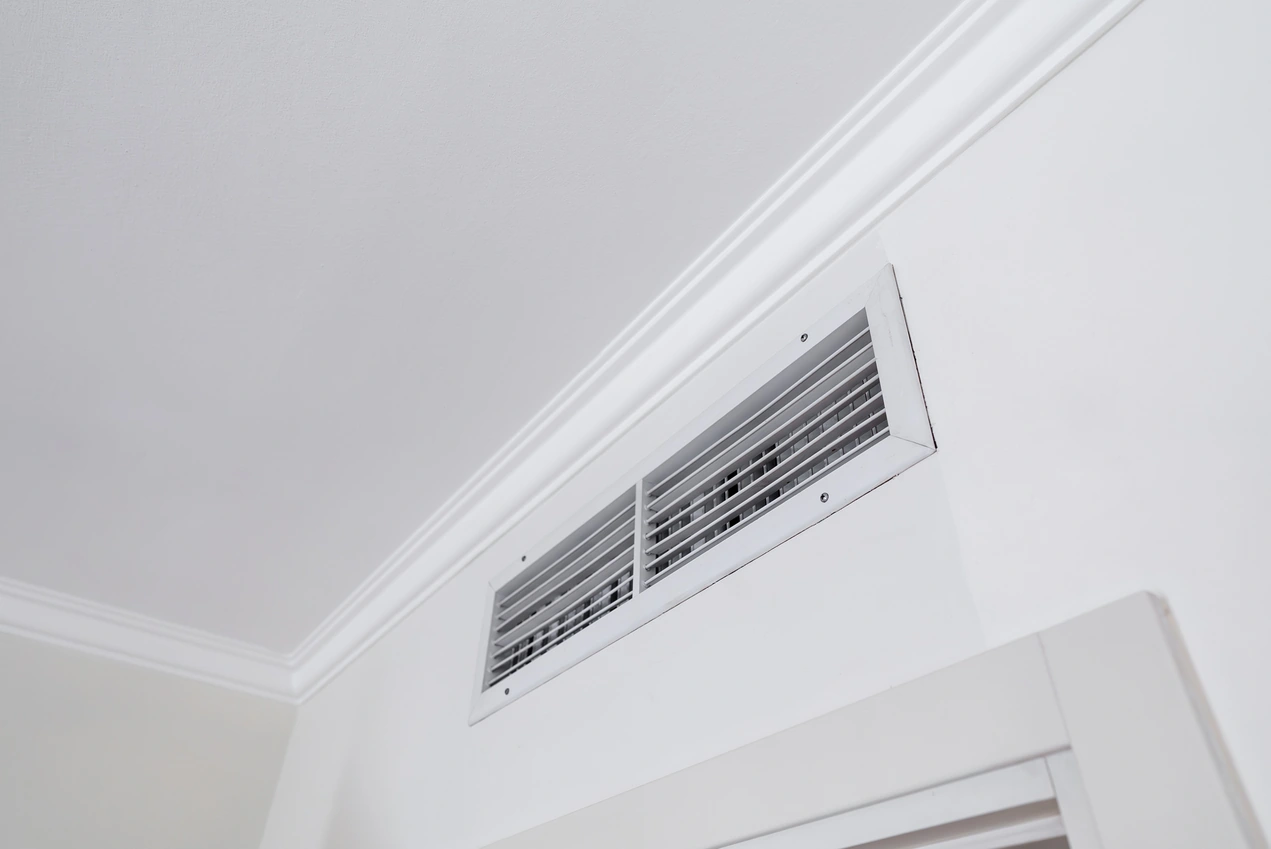
AC vent condensation in Denver home.

Why Are AC Vents Sweating? Causes and Fixes

During the winter and fall, you might notice condensation forming on the outside of your window glass. In the summer, the same condensation can be found on your AC vents. While it might not be an immediate emergency, condensation can impact your family’s health and comfort over time.

So, why does condensation form on windows? Will your house grow mold? To learn more about window and AC vents sweating, read on.

Why AC Vents Sweat in the First Place

AC vent sweating occurs when warm, humid air meets a cold surface. In technical terms, it happens when the vent’s surface temperature reaches the dew point. The dew point is the temperature at which air becomes saturated and water vapor begins condensing into liquid.

While an unusually humid day can result in this symptom happening, there are other causes of vent sweating that are more concerning. Because of this, it’s a good idea to schedule a professional HVAC appointment if you have water dripping from your AC vents.

Signs Your AC Vents May Have a Bigger Problem

If you notice the following symptoms, you should reach out to a trusted local HVAC company for help right away.

  • Pooling water near your AC unit
  • Sagging, wet drywall
  • Moldy or musty odors
  • Mold and mildew growth
  • An unexplainable rise in energy costs

It only takes a couple of days for water to cause mold and mildew growth. Left untreated, HVAC humidity problems can negatively impact your family’s respiratory health and trigger allergy symptoms. Besides leading to HVAC system failure, pooling water and high humidity can damage your wooden floors, cabinets, paint, and drywall.

Common Causes of Sweating AC Vents

Why does condensation form on windows and AC vents? In most cases, there are five main AC vent condensation causes that may be responsible.

  • High Indoor Humidity: If your relative humidity (RH) is higher than 55% to 60%, it can cause AC vent sweating.
  • Poorly Sealed Ducts: When your ductwork has air leaks, the hot, humid air around the duct can get inside it and cause sweating.
  • Bad Duct Insulation: If your duct insulation is damaged or old, it can cause sweating along the stretches of ductwork that run through hot, humid attics and crawlspaces.
  • Poor Airflow: When your HVAC system has a clogged filter or obstructed registers, it can cause less air to come out of your vents. Restricted airflow can cause vent surfaces to become excessively cold, increasing condensation. 
  • Oversized AC Units: Normally, the AC removes moisture from the air while it cools. If the AC is oversized, it will reach the appropriate temperature and shut off before the humidity level has dropped enough.

Troubleshooting Steps Homeowners Can Try

From AC airflow issues to poor duct insulation, multiple problems can cause AC vent sweating. While more complex issues should be left to the professionals, there are a few basic solutions you can try on your own.

  • Filter Change: Replace the air filter to improve the airflow in your home.
  • Temperature Adjustment: A warmer indoor air temperature in the summer can reduce the likelihood of vent sweating.
  • Drain Line Cleaning: Clogged condensate drain lines can cause pooling water and a full drain pan, which can increase the humidity in your home.
  • Insulation Upgrades: If you can access your attic or crawlspace, you can inspect the insulation around your ducts to verify that it is in place and undamaged.
  • Humidity Reduction: Homes that have a dehumidifier can adjust their desired humidity level to prevent AC sweating.

When To Call an HVAC Professional

If your troubleshooting for sweat air vents and leaking water doesn’t work, you should always reach out to a professional for help. We also recommend scheduling HVAC repairs as soon as you notice the following symptoms.

  • Pooling around your AC unit
  • Mold and mildew growth
  • Unusual sounds or smells
  • Airflow issues
  • A decline in performance
  • Suspected low refrigerant levels
  • Mechanical issues

For the safety of your home and family, you should never try to address mechanical, electrical, or refrigerant problems on your own. 

How Professionals Fix Sweating AC Vents

Once you reach out to our team for AC vent and ductwork condensation issues solutions, we will fully inspect your system to diagnose the source of the problem. Then, we can seal duct leaks, improve airflow, clear your condensate drain line, and upgrade damaged duct insulation.

Sometimes, the cause is an oversized AC. To troubleshoot this problem, our team will perform a Manual J calculation and determine the appropriate AC size for your home. 

Some homes and regions are more humid. In these instances, the best option may be to install a whole-home dehumidifier. Once your home’s RH is lowered, vent sweating should decrease.

How To Prevent AC Vent Condensation in the Future

As a homeowner, there are a few steps you can take to prevent the humidity and AC airflow issues that lead to vent condensation.

  • Change your air filter every 30 to 90 days to ensure proper airflow.
  • Seal the metal vent boot that connects your vent to the drywall. Fiberglass insulation can help reduce condensation by limiting contact between warm humid air and cold vent surfaces.
  • Fix or replace your ductwork insulation.
  • Keep your indoor humidity lower.
  • Turn on exhaust fans in your bathroom and kitchen to vent steam from cooking and showering.
  • Raise your temperature settings so that your home doesn’t get as cold.

Why Homeowners Trust Elkhorn Heating, Air Conditioning, Plumbing, & Electrical

Over the years, Elkhorn has developed a reputation as the area’s trusted source of HVAC expertise. Local residents turn to us for a few key reasons.

  • Customer Education: We walk you through each step of the process, so there are never any hidden surprises.
  • Same-Day Services: When an unexpected breakdown occurs, you need the peace of mind that comes with having HVAC technicians readily available.
  • Problem Solvers: Our team won’t rest until we’ve found the best solution for your HVAC problems.
  • Trusted Advisors: Local residents trust us to provide relevant, honest advice about their problems.
  • Customers for Life: We prioritize your comfort and satisfaction because our goal is to build customers for life.

Schedule an HVAC Inspection Today

If you’ve been trying to find the answer to “Why does condensation form on windows?”, we can help. Our team can review any condensation on air vents and windows to diagnose the cause. Then, we can recommend the best repairs, IAQ upgrades, or maintenance for your situation.

Book your next HVAC inspection today.

Frequently Asked Questions About Sweating AC Vents

Why are my AC vents sweating?

AC vent sweating occurs when the temperature of the vent reaches the dew point. At this point, the water vapor in the air condenses around the cold vent.

Is condensation on AC vents normal?

While it is a fairly common issue, it is not something that should be happening. This problem often occurs if you have excessively high indoor humidity, poor airflow, damaged duct insulation, or a clogged condensate drain. All of these causes should be investigated and addressed to prevent mold growth and pest infestations.

Can sweating vents cause mold?

Absolutely. RH levels above 70% for extended periods can significantly increase the risk of mold growth.

How do I stop my air vents from sweating?

You have to determine the underlying cause of the sweaty vents. One of our HVAC technicians can test your IAQ to determine if there are any humidity-related issues. We can also clear your condensate drain line, improve your airflow, and fix damaged duct insulation.

Can high humidity make vents sweat?

Yes, it can. High humidity levels are one of the leading causes of vent sweating. If this is the cause of the condensation, we can install a whole-home dehumidifier to adjust your RH.

Should I worry about water dripping from vents?

You should always schedule an HVAC repair appointment if there is water dripping from your vents. Any water or humidity can contribute to pest problems and cause mold to grow. Because of this, the underlying cause needs to be addressed and resolved promptly.

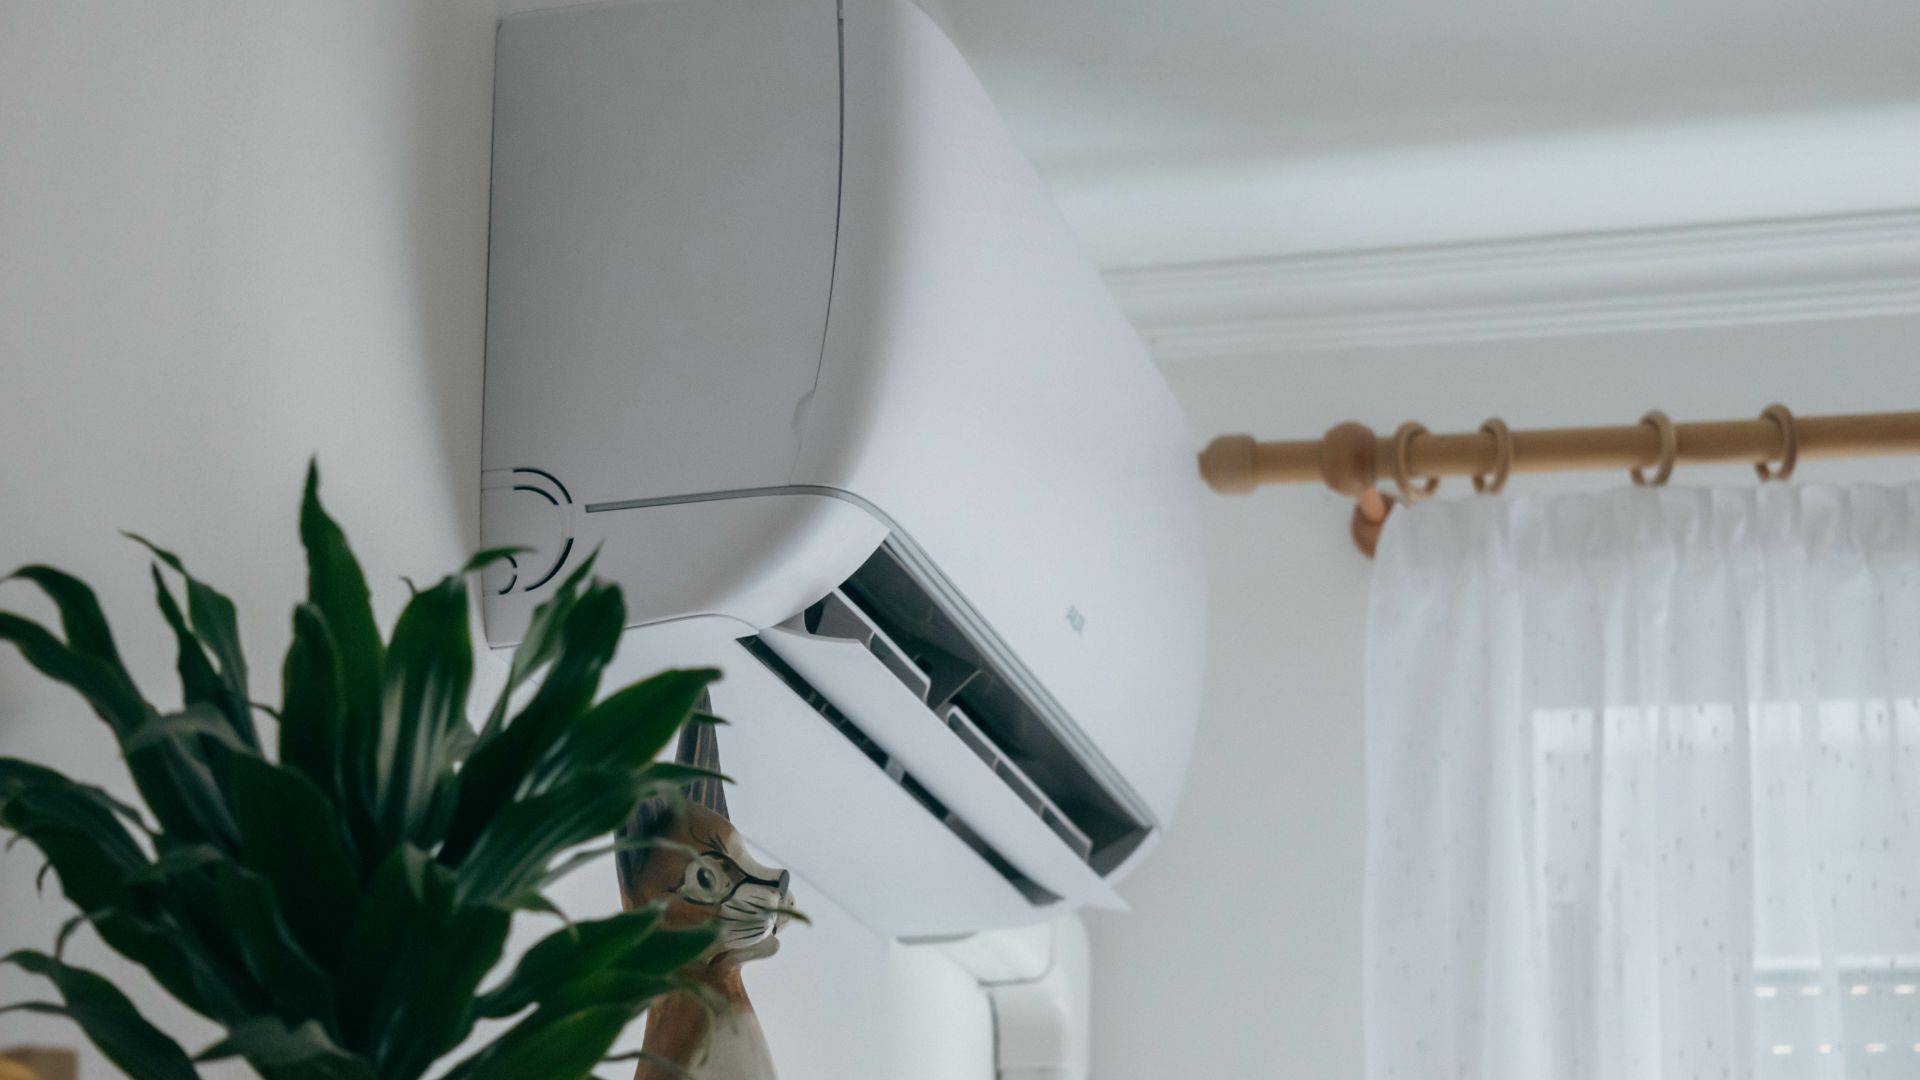
Image of a ductless mini-split air conditioner mounted on the wall

Loud AC Noises Explained: What Denver Homeowners Should Listen For

At Elkhorn Heating, Air Conditioning, Plumbing & Electrical, we often get calls about unusual AC noises. As a homeowner in the Denver and Littleton area, understanding common AC sounds is essential for troubleshooting issues and knowing when to call for help. By proactively repairing common AC problems, you can prevent minor issues from escalating into costly repairs.

Why is my AC so loud? And what can I do about it? To learn more about why your AC is making a loud noise in Denver, read on.

Not Every Loud AC Means the Same Thing 

In Denver and Littleton, our ACs have to deal with dust, extreme temperature swings, hail damage, and debris. These factors, along with normal wear, can cause units to break down. While some AC noises are perfectly normal, others indicate that your unit is having issues. By understanding the meaning of different sounds, you can determine if your AC has loose parts, electrical malfunctions, or airflow problems.

Which Sounds Are Usually Normal?

Before you call for AC repairs, take a moment to listen to your unit. Note when the sounds are occurring and what they sound like. The following noises indicate your AC is operating exactly as it should.

  • Routine Startup and Shutdown Sounds: A slight whoosh as air initially rushes out of the vents and light ticking as ductwork expands are both normal sounds. 
  • Steady Fan Noises From the Outdoor Unit: If your outdoor unit is functioning properly, you’ll hear a steady fan noise.
  • Brief Thermostat or Duct Expansion Sounds: Electrical relays in the thermostat can cause a single click. Similarly, ductwork can make light tapping or banging sounds as it expands and contracts due to changing air temperature.

Common AC Noises and What They Often Mean 

So, why is my AC so loud? From banging noises to buzzing sounds, the following sounds indicate that something is wrong with your AC installation

While you may be able to temporarily continue running your AC when rattling noises are present, you should immediately shut off your AC if you notice any other sound on this list. If the AC continues to run, it can pose a risk to your family, your home, or your air conditioning unit.

Banging or Clanking

If you notice an AC banging noise, what it means is that there are likely broken or loose internal components, blower problems, or faulty motor components. All of these issues must be addressed by a professional.

Buzzing

A buzzing noise is often due to loose wiring, contactor problems, electrical malfunctions, or debris around the outdoor unit. You can troubleshoot by cleaning away debris around the outdoor unit. If this doesn’t work, you’ll need to call for professional AC repairs.

Rattling

Rattling noises often stem from debris, fastener issues, loose panels, and aging cabinet parts. You can tighten accessible exterior panels, but do not open any internal components.

Hissing

Hissing noises often stem from refrigerant leaks, duct leaks, and pressure problems. All of these problems should be inspected by one of our experienced Comfort Specialists. 

Screeching or Squealing 

These noises often stem from the fan motor. In older units, they can also be due to belt-related issues.

Repeated Clicking

While a single click is normal when your AC starts up, repeated clicking indicates hard starting, failed electrical components, or control problems.

Humming With Poor Cooling Performance

If your AC is blowing hot air or struggling to keep your home cool, a humming sound may indicate capacitor problems or a strained AC compressor.

What Homeowners Can Safely Check 

When your air conditioner is buzzing or rattling on a hot day, you don’t have to panic. With basic Colorado AC noise troubleshooting, you can fix simple problems. If these solutions don’t work, our Comfort Specialists are only a phone call away.

Check 1: Replace the Air Filter

Dirty filters can cause poor airflow and a dirty evaporator coil. Filters should generally be replaced or cleaned every 30 to 90 days.

Check 2: Clean Around the Outdoor Unit

To troubleshoot why your outside AC unit is loud in Littleton, you can start by clearing away any leaves or debris that are within 2 to 3 feet of the outdoor unit. If this doesn’t work, you may need professional repairs.

Check 3: Check for Loose Fasteners and Exterior Panels

You can tighten loose exterior panels and fasteners yourself, but opening them should be left to the professionals.

Check 4: Note Unusual Sounds

Pay attention to odd noises and if they occur at startup, while running, or at shutdown. This can help your Comfort Specialist diagnose the problem when you call for help.

For your safety, never open electrical components. If the noise is severe, immediately shut your system off.

When Loud Noise Means You Should Turn It Off 

You should immediately shut off your unit and call for help if you hear any of the following noises.

  • Metal-on-metal noises
  • Sounds that occur with frequently tripped breakers or burning smells
  • Loud humming with no cooling
  • Sudden screeching or banging noises
  • Repeated clicking sounds

With our same-day diagnostics and no hidden fees, Littleton and Denver homeowners can quickly resolve complex issues. To avoid future problems, you can use your membership plan to get complimentary tune-ups. The plan also includes special discounts on repairs, so you can lower the cost of any unexpected breakdowns.

Frequently Asked Questions 

When is AC noise normal, and when is it a problem? 

A steady fan noise is normal. Repeated banging, buzzing related to electrical behavior, new screeching sounds, and loud humming with poor cooling performance are all signs of an AC problem that needs to be fixed.

Should I keep running a loud AC? 

In most cases, no. Immediately shut off your unit if you notice any sudden or severe noise. Additionally, frequent breaker trips or noises that occur with poor cooling performance are signs you should shut off your AC and schedule a service appointment.

Get Help With Your Unusual AC Noises

If you’re wondering, “Why is my AC so loud?”, we can help. Our Comfort Specialists can diagnose your AC noises through our same-day services in Littleton, Denver, and the surrounding metro area. 

Our team can determine the meaning of the sound and when AC noises mean repairs. Through our upfront pricing and 100% no-interest financing, you can quickly resolve the problem. Learn more by contacting our team today.

Image of an Elkhorn HVAC technician

Why Your AC Compressor Isn’t Working: Common Causes and Next Steps

Your AC compressor is not working, and it’s an especially hot day in Denver. Because this frustrating problem can be due to multiple causes, it’s important to figure out why it is happening. While there are some checks you can do on your own, all mechanical, electrical, and refrigerant-related work should be left to a Comfort Specialist from Elkhorn Heating, Air Conditioning, Plumbing & Electrical.

What Homeowners Mean When They Say the Compressor Is Not Working 

Often, we’ll get emergency calls about AC compressors not working. This frequently occurs if the outside AC unit is humming and not cooling. The unit may also produce clicking noises, trip the breaker frequently, or remain completely silent. 

Many different issues can look like an AC compressor failure. These problems can be caused by other faulty components as well. Because of this, it’s always a good idea to have a professional inspect your unit if you suspect compressor malfunctions.

Safe First Checks Before You Call 

If you think your AC compressor is not working, there are a few basic checks you can perform to troubleshoot the malfunction.

Check 1: Confirm Your Thermostat Settings

If the thermostat isn’t set to “cool” mode or the setpoint is too high, it will seem like your AC compressor is not turning on.

Check 2: Inspect the Air Filter

Routine maintenance is integral for preventing airflow problems and premature wear. Ideally, the air filter should be replaced every 30 to 90 days. If it is clogged from intense AC use, it needs to be replaced earlier. For complimentary tune-ups and springtime performance inspections, Denver homeowners can check out our Whole Home Comfort Plan.

Check 3: Verify the Breaker Is On

Many outdoor units use a separate breaker. If this breaker trips, you will still feel airflow inside. Because the outdoor unit isn’t on, the airflow will feel warm

You can troubleshoot this issue by turning the breaker on again. However, you should immediately schedule repairs if you notice the breaker tripping right away.

Check 4: Inspect the Condenser Unit

Check your condenser unit for debris or signs of obvious damage. If it is dirty, you can use a gentle stream of water from your hose to clean the unit. Then, remove any debris and plant matter that is around the unit.

Check 5: Listen for Unusual Sounds and Brief Starts

Pay attention to any humming or continuous clicking sounds. You should also note if the AC briefly starts up before shutting down again.

If your Denver AC compressor is not starting, you should never open panels or reset the breaker repeatedly. For the safety of your home and family, electrical and refrigerant repairs should always be left to the experts.

Symptom-by-Symptom Troubleshooting Guide

Over the years, we’ve dealt with all types of AC symptoms. The following are some of the most common compressor-related symptoms and when you should call for help.

Symptom: Unit Will Not Start at All

Possible Causes: This issue can occur if there is a problem with your capacitor, contactor, wiring, or breaker. 

When To Get Help: You should call for help if the unit won’t switch on after you reset the breaker once.

Symptom: Fan Runs but No Cooling

Possible Causes: You may notice this type of problem if you have a faulty compressor, control problem, or refrigerant issue. 

When To Get Help: If there is a hissing noise or your unit keeps blowing warm air, it’s time to call for help.

Symptom: Clicking or Humming 

Possible Causes: A clicking or humming sound may occur if you are dealing with a locked rotor scenario or failed start components. Often, homeowners will note that an AC compressor clicks and then stops if there is a problem with the capacitor, motor, refrigerant levels, or contactor. 

When To Get Help: If your outdoor unit is on when your indoor fan is off, or you smell a burning odor, you should schedule repairs right away.

Symptom: Breaker Trips When Cooling Starts

Possible Causes: You may notice this problem if there is an electrical overload or a shorted component. However, this symptom can also occur when your compressor is strained.

When To Get Help: When the breaker trips more than once, you should call for help because this means that there is a severe electrical problem involved.

The Most Common Causes We See in the Field 

At Elkhorn Heating, Air Conditioning, Plumbing & Electrical, we often get called about common issues that mimic AC compressor failure. Our compressor calls result in a range of different problem identifications.

  • Failed capacitor
  • Dirty coils
  • Faulty contactor
  • Airflow restrictions
  • Refrigerant leaks that are straining the compressor
  • Electrical malfunctions from panels, disconnects, or wiring

Sometimes, the main issue is truly the compressor. In general, we’re more likely to see true compressor failure in older systems than in newer ones.

When To Shut the System Off and Call Right Away 

When your Littleton AC is not cooling, troubleshooting is normally the first step. However, you should immediately turn off your unit and get help if you notice any of the following signs.

  • Repeatedly tripped breakers
  • Burning odors
  • Loud metal-on-metal noises
  • Visible electrical damage
  • Hard-start behavior
  • Any time you have vulnerable family members and no cooling options during heat waves

Whether you need same-day repairs or an AC installation, our Comfort Specialists are committed to upfront pricing and no hidden fees. For a more in-depth look at common compressor warning signs and how to decide between replacing or repairing your AC, check out our compressor troubleshooting guide.

Frequently Asked Questions

Does this always mean the compressor is bad? 

Not always. While it may seem like the compressor is bad, similar symptoms can occur if you have a problem with your contactor, capacitor, or thermostat.

Should I keep resetting the breaker? 

When your breaker trips, note it and reset it. If your compressor breaker keeps tripping, your AC likely has an underlying problem that must be diagnosed by a professional.

Get Support With Your Pressing AC Problems

Is your AC compressor not working? Elkhorn Heating, Air Conditioning, Plumbing & Electrical offers same-day services and upfront pricing throughout the Littleton, Denver, and surrounding metro area.

We will diagnose the cause, explain your AC repair or replacement options, and provide you with transparent, upfront pricing before we begin any work. Call us today at 720-615-0098 or fill out our online form.

Elkhorn technician educating the homeowner about their HVAC equipment.

HVAC Financing Options for Littleton and Denver-Area Homeowners

Whether you’re dealing with a failing AC in the summer or need to replace an aging furnace before winter, budgeting for unexpected upgrades can be challenging. In our older South Metro area, the housing stock typically has older heating, ventilation, and air conditioning (HVAC) units that are reaching the end of their lifespans. While planning a replacement can be challenging for your family’s budget, it is often a necessity to avoid unexpected breakdowns during extreme cold or heat.

For most residents, especially first-time homeowners, getting an HVAC repair or replacement is rarely a planned expense. At Elkhorn Heating, Air Conditioning, Plumbing & Electrical, we do everything we can to make this process easier. By taking advantage of our HVAC financing options in Littleton and Denver, homeowners can get budget-friendly upgrades when they need them.

When Financing Makes Sense for HVAC Work

Through 0-interest HVAC financing in Denver, you can perform necessary upgrades that are outside of your normal budgeting ability.

  • Planned Replacements: Financing helps homeowners maintain their cash flow when they get a full replacement.
  • Large Repairs: On a new system, paying for a large repair makes sense because the unit still has more life left.
  • Bundled Improvements: If you want to get a new thermostat, indoor air quality upgrades, furnace replacement, and air conditioner installation at once, financing can help.

As a homeowner, it’s important to remember that financing isn’t the right choice for everyone. If you can afford a large upgrade or only need to perform a small repair, you’re likely better off paying out of pocket. Financing makes sense when you have a pressing HVAC service that doesn’t fit your pocketbook.

Repair vs. Replace: How Financing Changes the Math 

When deciding whether to repair vs. replace and financing for HVAC systems, it helps to look at the total cost over time. If you have an aging system, paying for repeated repair bills can quickly add up. Instead, it likely makes more sense to finance a one-time major replacement.

In Denver, many homes were built in the 1980s to 2000s. Because of this, local homes often have systems that are significantly past their prime. By scheduling a diagnostic appointment with Elkhorn, you can get honest feedback on whether a repair or replacement makes more sense.

What 100% No-Interest Financing Helps With 

From our Whole Home Comfort plan to same-day repairs, Elkhorn is here to help you get the services and support you need. If you’re struggling to figure out how to pay for an HVAC replacement in Denver, financing offers a few important benefits.

  • Less upfront friction on paying for planned projects
  • More manageable monthly payments than a high upfront cost
  • Easier budgeting if you also have to pay for a mortgage, childcare, and other obligations
  • Ability to afford a long-term solution instead of a stopgap fix

Questions Homeowners Should Ask Before Choosing Financing 

Before you sign up for HVAC financing options in Littleton or Denver, there are a few questions you should ask yourself to determine if this is the right decision for your family.

Question 1: What Work Am I Financing: A Repair, a Replacement, or a Full Comfort Upgrade?

If you’re planning a minor or inexpensive repair, it is often easier to just pay for the cost yourself. More expensive upgrades, like a furnace replacement or a full comfort upgrade, are good options for financing.

Question 2: How Old Is My Current System, and How Much Useful Life Is Realistically Left?

A younger system is more likely to last longer, making repairs a wiser choice. Because older units require more frequent repairs, it eventually becomes more cost effective to replace them instead of performing more repairs.

Question 3: What Does the Monthly Payment Look Like Compared With Repeated Repair Costs?

As a part of your cost-benefit analysis, you should include the expected cost of your future repairs. Then, compare your expected repair costs against the monthly financing payments and projected energy savings from a new unit.

Question 4: Will This Choice Improve Comfort, Reliability, and Energy Use Enough To Justify the Spend?

If you already have an energy-efficient, modern HVAC system, getting an upgrade might not make a big difference for your family. Once your performance and comfort start to decline, the cost of a new system starts to make more sense.

Why Shoulder Season Is the Best Time To Plan 

Whether you’re looking for AC or furnace replacement financing in the Denver metro area, the shoulder season is the best time to book your appointment. Spring and fall allow you to review your options without the pressure of having an emergency breakdown. Plus, our HVAC technicians have better availability during the off-season, so you can easily pick the time and day that works best.

In Colorado, our extreme weather swings cause added stress on systems. Because of this, it’s especially important to be proactive about performing upgrades during the shoulder season.

Frequently Asked Questions

When does HVAC financing make sense? 

While furnace and AC financing in Littleton, CO, is a good option for some homeowners, it isn’t the right choice for everyone. Financing is better suited for large projects that would affect your cash flow. Additionally, payment plans are a good alternative if you want a long-term solution instead of a cheaper stopgap repair.

Should I finance a repair or replace the system? 

Deciding whether to repair or replace depends on your system’s age, repair history, and future replacement needs. If your system will likely need to be replaced soon, getting an AC replacement is often the better choice. Alternatively, homeowners who plan on selling their house in the future may want to delay any major investments.

Does financing help me choose a better system? 

In some cases, it can. As a homeowner, you don’t want to be in a position where you pick a worse solution just because the upfront cost is lower. Financing is available so that you can make the right repair or replacement decision for your family without having to worry about the immediate cost. HVAC payment plans in Colorado are simply there to give you more options.

Get Help Planning Your Next Upgrade

Uncertain about whether you should repair or replace? Elkhorn offers honest recommendations, upfront pricing, and same-day services in the Denver metro area.

Ask about our HVAC financing in Littleton and Denver. Our 100% no-interest financing can help you budget for a planned upgrade. 

Ready to price out your options? Visit our financing page or schedule an estimate with our team.

AC Compressor Troubleshooting Guide for Denver Homeowners

Poor cooling performance, unusual sounds coming from the outdoor unit, and frequently tripped breakers are common signs that you may have a faulty AC compressor. However, these signs can also occur because of other problems as well. By working with a heating, ventilation, and air conditioning (HVAC) technician from Elkhorn Heating, Air Conditioning, Plumbing & Electrical, you can get a professional diagnosis of your AC problem.

To get a better understanding of what’s going on, read on to see common symptoms and solutions in our compressor troubleshooting guide.

What the Compressor Does in an AC System 

So, what does an AC compressor do? Compressors are an integral part of your air conditioning system. They pressurize the refrigerant so that it can condense from a gas to a liquid in the condenser. Refrigerant is a special chemical compound that is used in ACs to absorb heat. Thanks to the compressor, the refrigerant can release heat outdoors before it is circulated back into your home. 

If there are problems with your compressor, it can hinder this pressurization and heat transfer. As a result, your cooling performance can be dramatically affected.

Signs Your Compressor May Be Struggling 

As a homeowner, there are a few common signs that indicate your AC compressor may be struggling.

  • Warm air from your vents
  • Lower energy efficiency 
  • Hard starts
  • Extended run times
  • An outdoor unit that hums but won’t cool
  • Ongoing clicking sounds
  • Inconsistent indoor comfort levels
  • Tripped breakers when cooling starts

Common Causes of Compressor Problems 

There are a few common compressor failure causes in Colorado that our team sees most often. By scheduling routine maintenance, you can prevent these problems from happening. When they do occur, tune-ups also allow us to catch the malfunction before it escalates into a compressor failure.

  • Electrical Issues: If the capacitor or contactor is faulty, it makes it more difficult for the compressor to start and leads to premature wear.
  • Low Refrigerant Charge: When refrigerant leaks out, the compressor has to work harder to achieve the same temperature level. As a result of the added strain, the compressor can break down.
  • Dirty Coils and Airflow Restriction: Both of these issues make the system work harder than it is designed to.
  • Aging Equipment and Repeated High-Load Cycles: Repeated periods of high use put an added strain on the AC compressor. Similarly, aging equipment has worn down over time, leading to a lower capacity and more repairs.

In Colorado, there are other factors that impact the longevity of your AC installation. High UV exposure, hail damage, and dust buildup cause increased wear and tear. Colorado also experiences extreme, rapid weather shifts, which makes HVAC systems work overtime.

What Homeowners Can Safely Check First 

As a homeowner, you can use our compressor troubleshooting guide to safely check key systems. If the following tips do not fix the problem, you can contact our team for diagnostics instead.

Step 1: Check the Thermostat

Make sure the mode and set point are set appropriately.

Step 2: Replace the Air Filter

To avoid airflow issues and a dirty evaporator coil, homeowners should replace clogged air filters.

Step 3: Inspect the Breaker

If your outdoor unit isn’t starting, see if the breaker has tripped. However, do not keep resetting it if it trips again. Repeated trips indicate an underlying problem that must be addressed by a professional.

Step 4: Clean Around the Condenser

For proper airflow, clear away any obvious debris that is around the condenser.

Step 5: Listen for Noise Patterns

When you call our team for repairs, it helps to know the AC compressor signs and symptoms you’re experiencing. Note any unusual noise patterns and what happens when cooling starts.

For the safety of your home, HVAC system, and family, never open panels or cabinets. Additionally, any refrigerant-related components should be handled by a certified technician.

Fixes vs. Professional Repairs 

When we arrive at your home, our first goal is to determine whether the problem is your AC compressor or something else. As a part of our diagnostics, we will test your refrigerant pressure. We will test electrical components, such as the capacitor, and verify the amp draw.

These tests are essential because many symptoms that appear to be common AC compressor problems are actually related to other components. Airflow issues, faulty capacitors, and thermostat malfunctions can sometimes be mistaken for a compressor problem.

When Compressor Trouble Points to Replacement 

In Littleton and the South Metro area, many of our homes were built between the 1980s and 2000s. Many of these older homes have aging compressor issues. Because of the declining performance, more frequent repairs, and reduced energy efficiency involved, it often makes more sense to replace these older units.

At Elkhorn Heating, Air Conditioning, Plumbing & Electrical, we’ll provide a professional evaluation to help you determine if you need an AC compressor repair or to replace it completely. Our 100% no-interest financing allows you to make the right choice for your family, regardless of the upfront cost. Afterward, our convenient Whole Home Comfort Plan offers complimentary tune-ups and repair discounts, so your new system can last as long as possible.

Frequently Asked Questions

How do I know if my AC compressor is bad? 

An AC compressor won’t just break down without some type of symptom. Tripped breakers, warm air, hard starting, and unusually long cooling cycles commonly occur when the compressor is failing. However, it’s important to note that these symptoms can be due to other problems, so they don’t confirm a compressor failure on their own.

Can a compressor problem be something else? 

Sometimes. When you have a failed capacitor, low refrigerant levels, or a thermostat issue, it can mimic the symptoms of a faulty compressor. This is why it’s so important to get your Denver AC compressor issues diagnosed by one of our Comfort Specialists.

Troubleshoot Your AC Compressor Issues

If your AC is experiencing some of the symptoms from our compressor troubleshooting guide, we can help. Elkhorn Heating, Air Conditioning, Plumbing & Electrical can diagnose your AC problems with our same-day services and upfront pricing.

Ask our Comfort Specialists about whether a repair, component replacement, or larger system upgrade is right for you. Contact us today.

Spring Electrical Safety Checklist for Denver Homeowners

When spring arrives, most homeowners immediately think about what they need to do to prepare their heating, ventilation, and air conditioning (HVAC) equipment for warmer weather. While HVAC maintenance is important, your electrical system also matters. All of your electrical system components have to work extra hard to power your AC unit, outdoor entertainment space, and pool pump during the summertime.

By completing the following spring electrical safety checklist in Denver, you can keep your home safe during peak season. If you do discover a problem, Elkhorn Heating, Air Conditioning, Plumbing & Electrical offers the same-day services you need.

Is Your Electrical Panel Ready for the Cooling Season? 

The average central air conditioner uses between 3,000 and 3,500 watts of energy, making it one of the largest electrical consumers in your household. When it turns on, it draws a huge surge of power. 

If your electrical panel is appropriately sized, these HVAC surges shouldn’t be a problem. When panels are already close to full capacity, this can cause issues. Your electrical panel may be struggling if you notice any of the following symptoms.

  • Circuit breakers trip when your AC starts.
  • You smell burning odors.
  • The panel feels warm to the touch.
  • Lights flicker when your AC or other large appliances turn on.

You may also need a larger panel to match summertime electrical demand. For example, many homes run extension cords to power their outdoor equipment. This isn’t safe long term, so it’s better to invest in a panel upgrade.

Your electrical panel is basically a metal box that splits your home’s electrical supply into different circuits. Then, each circuit has its own circuit breaker that can trip if it is overloaded. Normally, your panel will be located in your garage or basement.

Before the 1990s, homes generally had a 100-amp panel because families didn’t have a bunch of EV chargers, smart home systems, gaming systems, and home offices. If your home was built before the 1990s, your panel may need an upgrade. Additionally, an update is important if you’ve added major appliances to your home or carried out recent renovations. During our inspection, we’ll make sure your electrical panel is ready for summer in Denver by calculating your home’s ideal capacity and checking for common problems.

Spring Electrical Safety Checklist in 7 Steps

With this spring electrical safety checklist for Denver, local homeowners can protect their homes from electrical complications. 

  1. Inspect your electrical panel visually. The first step is to check the panel for signs of a problem. Note any burning odors, scorch marks, rust, or moisture. Don’t touch anything in the panel. If you do notice unusual symptoms, you should call one of our electricians right away.
  2. Test all GFCI outlets. GFCI outlets are designed to trip if moisture is present. A GFCI outlet compares the incoming and outgoing current. If the amount of current is different, the GFCI trips and shuts the circuit down. You can make sure your outlets are working by using the “test” button to trip the outlet. Then, you can push “reset” to restore power. If the outlet doesn’t trip or reset properly, schedule professional repairs.
  3. Check outdoor outlets and lighting. As a part of your outdoor electrical safety checklist, look at your light fixtures, outdoor lighting, and wiring for signs of damage. For example, Colorado’s freeze-thaw cycles can result in cracked covers, moisture inside outlet boxes, and exposed wires.
  4. Test smoke and carbon monoxide (CO) detectors. Your CO detector batteries should be replaced once per year. At a minimum, the CO detector should be replaced with a new one every 10 years.
  5. Look for signs of wiring stress. While you can’t see your home’s electrical wiring, you can still look for common signs that something may be wrong. Start by checking to see if outlets are warm to the touch, spark, or make crackling noises. Additionally, note any lights that flicker without an obvious cause. All of these symptoms could mean that there are wiring problems or loose connections in your home.
  6. Evaluate your surge protection. Whole-house surge protection diverts power surges so that they don’t harm your electrical systems. This is especially common during Colorado’s spring and summer thunderstorms. Through surge protection, you can prevent lightning damage to your HVAC unit, electronics, and smart home systems.
  7. Review seasonal electrical loads. From season to season, your family’s electrical consumption changes. If you plan on using landscape lighting, an EV charger, a pool pump, or a hot tub this year, now is your chance to double-check the condition of your connections and the size of your circuits.

Whole-Home Surge Protection: What It Is and Why It Matters 

whole-house surge protector is installed at your electrical panel. When a voltage spike occurs, the surge protector’s job is to protect all of your electrical circuits. This device is distinctly different from power strips because power strips are only designed to protect the appliances that are directly plugged into them.

Colorado is known for being one of the worst states for lightning strikes. A single strike can cause damage to your HVAC system, smart thermostat, gaming system, computer, and home wiring. Getting a whole-house surge protector in Denver costs a fraction of what it would cost to replace one major appliance. 

When you get your spring panel inspection, our team can also install your whole-house surge protector. We’ll check your panel’s capacity and determine the best protection level for your home’s needs.

Outdoor Electrical Prep for Spring and Summer 

With spring on the way, it’s time to start thinking about your outdoor lighting, outlets, and generator. Our freeze-thaw cycles can lead to winter ground movement. In turn, this can loosen buried wiring and harm fixture bases. Before spring is in full swing, double-check your lighting connections. 

You should also inspect your outlet covers and weatherproof boxes. Replace any that are missing, cracked, or impossible to close.

Spring is an excellent time to plan a wiring and electrical panel upgrade in Denver. Many homes in Castle Rock, Highlands Ranch, and Parker have large outdoor living spaces that are perfect for entertaining. To make the most out of these spaces, it’s a good idea to install extra circuits. 

You may also need dedicated circuits installed if you plan on adding a hot tub hookup, EV charger, or outdoor lighting. Homeowners may also want to install a generator so that they can avoid unexpected power outages during summer storms. Reach out to our electricians before the busy summer season arrives to get your home ready.

Signs Your Home’s Wiring Needs Professional Attention 

To protect your family, home, and electrical systems, it’s important to pay attention to any signs of a problem. If you notice the following malfunctions, give our electricians a call right away.

  • Frequent Breaker Trips: When breakers keep tripping, it is a sign that you have an overloaded circuit, a ground fault, or a short circuit. If you notice that this occurs when you run your AC at the same time as a large appliance, we likely need to update your home’s circuits.
  • Buzzing Sounds: Immediately call for help if you hear a buzzing noise. Similarly, an outlet or switch that is warm to the touch is a safety hazard.
  • Flickering Lights: Your lights shouldn’t flicker or dim whenever a large appliance turns on.
  • Burning Odors: Schedule an electrical inspection if you notice burning odors near your outlets, panel, or switches.
  • Two-Prong Outlets: Many older homes in Englewood, South Littleton, and other Denver neighborhoods have two-prong outlets that don’t have a ground. For your safety, these outlets should be updated.

The presence of any of these problems is an immediate sign that a home wiring inspection in Denver and Littleton is necessary. At Elkhorn, our licensed electricians can come out to your home to quickly diagnose the underlying problem and find the best solution. We’ll also explain our findings in plain language, so you can understand exactly what is going on.

Frequently Asked Questions

Do I really need an electrical inspection?

If any of the following situations describe your home, we recommend scheduling a spring electrical inspection in Colorado. 

  • Your home is already 20 years old or older.
  • You have experienced some of the warning signs above.
  • You have added major appliances.

Even if you haven’t dealt with these concerns, getting an annual check is good practice and a way to protect your home’s electrical systems.

How does whole-home surge protection work? 

When you get whole-home surge protection, we install it in your electrical panel. If an electrical spike occurs in the power grid, the surge protection operates like a shield that protects your electronics.

How do I know if my panel needs an upgrade? 

If you currently have a 100-amp panel, you should get an upgrade if you have an EV charger, central AC, or multiple high-draw appliances. One of our Comfort Specialists can provide a full evaluation when we conduct your spring inspection.

Can Elkhorn handle electrical work along with HVAC and plumbing? 

Absolutely. Elkhorn has electricians, plumbers, and HVAC technicians who can handle all of your home services. As a result, local residents can easily book combined spring inspections that address all of their home’s systems in fewer visits.

Improve Your Electrical Safety

Concerned about your breakers tripping? It’s time to tackle the spring electrical safety checklist for Denver homes. Summer places a higher demand on local electrical systems. Keep your home safe by having one of our licensed electricians check your panel and test your safety devices.

Call now to schedule your electrical appointment.

Spring Plumbing Inspection: 7 Things Denver Homeowners Should Check Now

Colorado winters can be incredibly hard on our plumbing. Freezing temperatures, freeze-thaw cycles, and frozen ground can harm your pipes, sewer lines, and outdoor fixtures. Ice expands as it freezes, which stresses joints and pipes. When the snow thaws, it can overwhelm your drainage systems. 

With spring already underway, it’s time to make sure your plumbing system is in optimal condition. At Elkhorn Heating, Air Conditioning, Plumbing & Electrical, we offer spring plumbing inspections in the Denver and Littleton areas.

Learn more about the best plumbing checklist for Denver homes, especially properties in the foothills and older buildings.

The 7-Item Spring Plumbing Checklist 

As part of your springtime checklist, there are seven key tasks that you can do to make sure your plumbing system isn’t damaged from last winter. 

1. Test Your Sump Pump

Your sump pump system is responsible for keeping floodwaters out of your home. Because of our storms and heavy rain, it’s a good idea to perform a sump pump spring test in Colorado.

To test your sump pump, pour a 5-gallon bucket of water into the pit. If everything is working properly, you should see the float rise. Once the pump activates, the water level in your pit should start to drop. Outside your home, you should see water leaving the discharge line. The water should be released at least 10 feet away from your foundation. 

If the pump doesn’t activate or the discharge line is clogged, give us a call for sump pump repairs. We also recommend getting a replacement once your sump pump is more than 7 to 10 years old. The best time for any sump pump repairs and replacements is in the spring before heavy rains arrive.

2. Inspect Your Outdoor Faucets and Hose Bibs for Freeze Damage

If you forgot to do your outdoor faucet and hose bib winterization check in Denver, these devices can quickly become damaged. Even with proper winterization, damage can happen. 

To check for damage, turn on each of your outdoor faucets. Then, check for leaks, a lack of flow, or a reduced flow rate. When freeze damage occurs, it can crack the valve body, which is invisible inside the wall. You may notice a steady drip from the pipe connection or handle if damage has occurred.

Make sure to check outdoor plumbing in the front and back of your home. Additionally, don’t forget about irrigation connections and faucets in your garage.

3. Check Your Water Heater for Wintertime Sediment Buildup

Over the winter, sediment can build up in your water heater. As part of your water heater maintenance, it’s essential to flush your tank. By doing so, you can boost your energy efficiency and extend the unit’s lifespan.

When you flush the tank, note any unusual sounds and other warning signs. If there is sediment buildup, you’ll often notice rumbling or popping noises. Meanwhile, moisture around the base and signs of corrosion mean you should schedule a professional inspection right away.

For the best balance of comfort and efficiency, set your water heater to 120°F. This temperature is hot enough to prevent bacterial growth and cool enough to prevent scalding.

4. Run and Test All Floor Drains

In Colorado, many homes are designed with floor drains in the basement. These drains often go unused for months at a time, but they are vital if any flooding occurs. 

A basic test can make sure your drains are ready for spring. Start by pouring water down one of the drains to confirm flow. If the water backs up or drains slowly, there is likely a blockage. You’ll need to schedule a professional drain cleaning to fix it.

This basic test is also important because it fills the P-trap. This trap is the curved section of pipe that you see underneath your plumbing fixtures. Because it holds water, it blocks sewer gas from entering your home. When fixtures aren’t used frequently, the P-trap can dry out and allow foul odors to come inside.

5. Inspect Visible Pipes for Signs of Winter Stress

As a spring home maintenance for plumbing in Denver, we also recommend looking for signs of winter stress and hidden leaks. In your basement and utility areas, look for any discoloration, small drips, or moisture around joints. On copper pipes, moisture may cause a patina to develop. 

Exterior walls are near the frigid outdoor air, so they naturally stay colder. Because of this, you should be especially observant of pipes that are near exterior walls.

6. Clean Gutters and Check Downspout Drainage Direction

Your gutters provide a clear path for snow melt and spring rain to leave your home. If you have disconnected downspouts or clogged gutters, the water can end up near your foundation. Besides causing mold growth and moisture in your basement, this also increases your sump pump load. When functioning properly, your downspout extensions should send the water at least 5 to 6 feet away from your foundation.

7. Walk the Exterior of Your Home

As the last step in your outdoor plumbing spring startup in Colorado, walk around the perimeter of your home. You should note any areas where the soil has settled against the foundation. This can cause low spots and pooling water. To fix this problem, you should grade the slope away from your home.

Before you wrap up your checklist, look at your window wells. Remove any debris, and make sure the covers are securely in place.

When To Call a Plumber vs. Handle It Yourself 

While you can handle plumbing winterization and spring maintenance on your own, some tasks should be left to the expert.

Things You Can Handle on Your Own

In most cases, you should be able to handle the following tasks on your own. If you need help with flushing the water heater or other maintenance tips, our comfort specialists are only a phone call away.

  • Testing the sump pump
  • Visually checking your pipes 
  • Flushing the water heater
  • Pouring water down drains
  • Cleaning gutters
  • Checking hose bibs

Instances Where You Should Call a Plumber for Help

We recommend immediately calling a plumber in the following situations.

  • Outdoor faucet leaks that are inside the wall
  • A sump pump that keeps running or won’t start
  • Unusual water heater sounds
  • Water heater corrosion
  • Backed-up floor drains
  • Active pipe leaks

If you have a new home that was built after 2005, your system may still be under the manufacturer’s warranty. By arranging for a professional inspection, you can document issues for making a warranty claim.

It’s also important to note that there is a sewage backup risk during heavy snowmelt. Excess water saturates the municipal systems, which can lead to sewage flowing into your basement drain. Because of this, we recommend installing a backflow preventer valve if you don’t already have one set up.

Looking for help with your plumbing maintenance? Elkhorn’s licensed plumbers can handle all of these plumbing tasks in a single visit. We’re able to serve customers throughout the Littleton, Aurora, Parker, Castle Rock, Englewood, and broader Denver metro area.

Foothills and Older Home Considerations 

Our region has unique climates and neighborhoods that require special care. Properties in Morrison, Indian Hills, and Evergreen have steep terrain and faster snowmelt runoff, so they face added plumbing risk in the spring.

Old homes in Harvey Park, Capitol Hill, University, South Littleton, and other established Denver neighborhoods often contain cast iron or galvanized pipes. These pipes are more vulnerable to wintertime stress, so pay attention to any rust-colored water when you turn on your faucets in the spring.

In Aurora, Brighton, and Commerce City, first-time homeowners have new buildings that have probably not been inspected since they were built. Because of this, it’s a good idea to schedule a spring walk-through.

No matter what neighborhood you live in, it’s important to inspect the vapor barriers and insulation in your crawl spaces. Moisture intrusion can happen during snowmelt, so this step is key for protecting your home from mold growth and moisture damage.

FAQs 

How often should I do a spring plumbing inspection? 

We recommend performing an inspection each year in the spring. The best time is after the last freeze has passed so that we can determine if there has been any winter-related damage. Because of the climate difference, foothills properties will generally need to wait until late April or May.

How long does this take? 

As long as there aren’t any problems, you can expect the full spring plumbing checklist in Denver to take around an hour. Our professional inspection covers all of the important tests and checks that you can’t complete on your own.

Can I combine this with an HVAC or electrical tune-up? 

Absolutely. Our comfort specialists handle plumbing, electrical, and HVAC systems, so you can easily combine all of these tasks into a single springtime appointment. For our clients, this makes planning home services much easier.

What are the most common spring plumbing problems in Denver? 

In Denver, the most common problems we see are dry P-traps in floor drains, untested sump pumps, cracked hose bibs, and sediment-heavy water heaters. From testing your sump pump each spring to winterizing hose bibs, these problems can be prevented. When they do occur, they can be easily fixed as long as they are caught early.

Schedule Your Next Plumbing Inspection

Ready for your seasonal inspection? If you’ve already completed your spring plumbing checklist in Denver, don’t forget to schedule a professional inspection. Our comfort specialists can ensure your water heaters, sump pumps, drains, and outdoor plumbing are working properly. 

Call us now to schedule your appointment.

Elkhorn HVAC technician working on a furnace, performing maintenance or repair on the HVAC system.

End-of-Season Furnace Care: What Denver Homeowners Should Do Before Summer

After running a furnace for six or seven months in a row, it’s important to take care of the unit before turning it off for the summertime. Most homeowners think about furnace maintenance after fall arrives. By that point, most heating, ventilation, and air conditioning (HVAC) companies are already booked out. 

With the help of Elkhorn Heating, Air Conditioning, Plumbing & Electrical, you can make sure your home is ready for the shifting seasons. Our HVAC technicians have better availability during the spring, so you have time to plan out your repairs and replacement needs.

To get you started, let’s look at the steps involved in end-of-season furnace maintenance in Denver and which tasks need to be handled by a professional.

When Heating Season Ends in the Denver Metro 

There’s no fixed date for when to stop running a furnace in Colorado. Most homes will need heat until May. In Morrison, Evergreen, Indian Hills, and other foothills neighborhoods, it’s common to keep the heat on until June.

As a result, many local homeowners end up using heat and air conditioning in the same week. Even though there are hotter days ahead of us, you shouldn’t turn off your furnace prematurely. Instead, let your thermostat handle the heating and cooling transition.

Typically, the best time for end-of-season furnace maintenance in Denver is when our overnight lows are consistently above 45°F to 50°F. For most neighborhoods in the Denver area, this normally occurs between late April and May.

End-of-Season Furnace Maintenance Checklist: 8 Steps 

To get started, use this spring furnace maintenance checklist for Colorado homes. When in doubt, you can always reach out to our HVAC technicians for professional diagnostics and support.

  • Step 1: Replace the air filter. If your furnace isn’t working right, one of the best troubleshooting tips is to try replacing the filter. Poor airflow can impact the furnace’s performance and increase the likelihood of repairs. Since your furnace has been in use since October, it’s time to give it a fresh filter.
  • Step 2: Inspect the area around your furnace. By looking for a few common signs, you can spot potential issues before they escalate. Check around your furnace and ductwork for soot marks, stains, condensation, or any other unusual signs.
  • Step 3: Clean accessible surfaces. Next, wipe down all of the surfaces you can easily reach. Dust accumulates over the course of the heating season and can negatively impact air quality.
  • Step 4: Vacuum the supply and return vents. Your return vents can collect dust and debris during the heating season. By vacuuming the vents, you can boost airflow and minimize respiratory issues.
  •  Step 5: Check carbon monoxide (CO) detectors. For the safety of your family, you need to verify that your CO detectors have not expired. You should also replace the batteries at least once per year.
  • Step 6: Note any issues from the past winter. If you notice higher-than-normal energy bills, unusual noises, uneven heating performance, short cycling, or other problems, remember to share them when your HVAC technician arrives for your seasonal HVAC tune-up.
  • Step 7: Adjust thermostat settings for spring. Now that spring is here, it’s time to adjust your thermostat settings with a moderate schedule. Your goal is to maintain your personal comfort during this transition period without causing excessive short cycling.
  • Step 8: Schedule a professional spring tune-up. One of the most important things you can do to prevent furnace repairs is schedule a spring tune-up each year. Through this spring maintenance, you can diagnose and fix problems now instead of waiting for the first chilly night of October.

Warning Signs Your Furnace Sent You This Winter 

As we reach the heating season end, maintenance in Colorado is essential for the safety and longevity of your unit. If you notice any of the following symptoms, it’s time to schedule professional repairs.

  • Odd Noises: Any grinding, high-pitched whining, or banging is a sign you need to get your unit repaired.
  • Short Cycling: If the furnace turns on and off more frequently, you may be dealing with thermostat malfunctions, an oversized system, a dirty filter, or an underlying repair.
  • Uneven Performance: When different rooms are hotter and colder than others, there may be a duct problem or a failing blower motor at fault. An aging system can also gradually lose capacity.
  • Yellow or Flickering Pilot Flame: If you have a yellow or flickering flame, it means there is incomplete combustion in an older unit. This is a major safety and efficiency concern, so it needs to be remedied right away.
  • Unusually High Energy Bills: A sudden increase in energy bills without a clear explanation is a sign that some of the furnace’s components may be starting to wear down.

If you notice any of the previous diagnostic clues, you don’t have to panic. You have plenty of time to fix the problem and schedule furnace care before summer in Denver.

The Repair-vs.-Replace Spring Assessment 

Deciding between a furnace repair and a replacement can be challenging. At Elkhorn, we won’t try to sell you on a product you don’t need. Our comfort specialists offer honest evaluations, so you can make the right choice for your home. 

The off-season is the best time to decide on repairs and replacement. You aren’t under pressure, so you can easily get quotes and compare financing options. To help you choose the best decision for your family, consider the following factors.

  • Age: A standard furnace lasts around 15 to 20 years. If your furnace is already in this range and requires repairs, it’s likely time to plan on a replacement.
  • The 50% Rule: Look at the cost of repairs vs. the replacement price. If the repair cost is 50% of the price of a new system, it’s generally better to get a replacement instead.
  • Efficiency Upgrades: The Annual Fuel Utilization Efficiency (AFUE) represents how efficient the furnace is at transforming energy into heat. A higher AFUE is better. Older furnaces often have an 80% AFUE rating. By switching to a modern, 95%+ AFUE model, you can significantly reduce your energy costs.

No matter what option you choose, Elkhorn’s 100% no-interest financing can make affording your new installation easier. 

Foothills and Mountain Property Considerations 

When it comes to scheduling a furnace inspection during spring in Denver and Littleton, it’s important to consider the local environment. Based on where you live, your furnace, boiler, or heat pump will require different types of care.

Homes in Morrison, Evergreen, and Indian Hills have higher elevation and more extreme temperatures, which pose unique challenges. Often, these areas have older homes with unusual heating configurations. For example, many of them rely on radiant heat, boilers, or propane. These configurations require specialized attention.

Absentee owners also need to be proactive about their pipes. You shouldn’t fully shut down your HVAC system unless you have taken precautions against frozen pipes.

Elkhorn understands what our local neighborhoods and climate need. Thanks to our higher altitude, there is less oxygen per cubic foot. Because this impacts combustion, furnaces have to be specially calibrated. Our comfort specialists understand these foothill communities, so we can safely optimize your high-altitude HVAC setup.

How Spring Furnace Care Connects to Fall Readiness

Whether you want to care for your furnace or plan for a heat pump installation, a spring tune-up is a chance to touch base with our comfort specialists, order parts, and optimize your HVAC installation. The spring tune-up helps us create a baseline for your system, so we can easily spot concerning changes in the fall. Plus, planning installations and repairs now allows us to avoid any lead-time delays that commonly occur in the fall and winter.

In most cases, a furnace that has been professionally inspected during the spring only needs a filter change and thermostat adjustment before the heating season begins in fall. Our team makes this inspection easy through our Whole Home Comfort Plan. This plan features spring and fall tune-ups, so your family can enjoy better peace of mind.

FAQs

When should I stop running my furnace in Colorado? 

There is no set date for when you should start your HVAC spring transition in the Denver metro area. Many Denver homes are still using heat in May. Instead of just shutting off the system automatically, let your thermostat be in charge of when your system should be in heat mode.

Can I run my furnace and AC on the same day? 

Absolutely. Today’s thermostats have an auto mode that allows them to heat and cool as needed. If your thermostat is not equipped with this feature, it’s time to consider getting a new thermostat installation.

Is it worth getting a furnace tune-up in spring? 

We strongly recommend getting a furnace tune-up during the spring. You aren’t dependent on using the furnace at this time, so it’s a good opportunity to clean the furnace and schedule necessary repairs. Because our technicians are more available in the spring, you’ll have an easier time scheduling your appointment. Additionally, a spring furnace tune-up means you can catch potential problems before next winter arrives.

Keep Your Furnace in Optimal Condition

Through end-of-season maintenance in Denver, you can gain peace of mind and make sure your furnace is ready when fall arrives. Our Whole Home Comfort Plan makes furnace maintenance easier through priority scheduling and complimentary tune-ups.

Schedule your furnace tune-up while our spring calendar is still open. Call us today.

Technician servicing a thermostat for AC controls in Denver home.

Your Complete Spring AC Startup Guide for Denver Homeowners

While some U.S. cities use their ACs constantly, this is not the case in Colorado. We often let our ACs sit idle for six or seven months in a row. Because of this extended dormancy, there’s a risk that the AC won’t work when you finally switch it on. Elkhorn Heating, Air Conditioning, Plumbing & Electrical can help you prevent unexpected complications through timely tune-ups and AC repairs.

By completing your spring AC maintenance checklist in Denver, you can be confident that your AC is ready for the hottest days of the summer. To see what your checklist entails, what to watch out for, and when you need a Comfort Specialist, read on.

When Denver Homeowners Typically Switch From Heat to Cooling 

Thanks to our semi-arid climate, we have fairly unpredictable spring temperatures to deal with. In Denver, we can experience 80°F days in March and snow flurries in May. However, most homeowners start to think about switching on the AC in late April or May. 

Deciding when to turn on an AC in spring in Colorado should be based on what’s comfortable for your family and how ready your AC is for warm weather. During the transition period between March and May, homeowners will likely need to use heating and cooling each day. By preparing your AC in advance, you can guarantee that your heating, ventilation, and air conditioning (HVAC) system is ready for everything.

To keep it cool this summer, first-time owners need to be especially proactive. In our newer subdivisions in Brighton, Aurora, and Commerce City, homeowners should inspect their builder-grade systems before hot weather arrives.

DIY Spring AC Startup Checklist: 7 Steps 

To learn how to start an AC after winter, start by working through the following checklist. In addition to handling the following maintenance tasks, you should also schedule your AC maintenance appointment with one of our Comfort Specialists.

  • Step 1: Check and replace the air filter. If you haven’t replaced your air filter since last fall, it’s time to do so. This is easily one of the most effective things you can do to boost your unit’s energy efficiency.
  • Step 2: Inspect the outdoor condenser unit. Debris can block the airflow in your outdoor unit. To prevent this from happening, remove any leaves and debris within 2 to 3 feet of the unit. Then, trim any bushes or plants in the same space.
  • Step 3: Check the condensate drain line. You can quickly check for a clogged drain line by pouring a cup of water down the line. Clogs can lead to indoor water damage, so it’s important to catch them early.
  • Step 4: Switch the thermostat to cooling mode. Before you start up your unit for another year, you need to verify that it’s working. Test it by switching the AC to cooling mode. Then, set the temperature a few degrees lower than your room temperature. If your AC is working properly, you should hear the outdoor unit kick on right away. 
  • Step 5: Listen for unusual sounds. If you hear buzzing, clicking, grinding, or complete silence, it’s time to get your air conditioner checked out by a professional.
  • Step 6: Run it for 15 minutes and check the airflow. As part of your spring AC maintenance checklist in Denver, you should run your AC for 15 minutes and check all of your home’s vents for airflow. If there is weak airflow coming from specific vents, your ductwork needs to be looked at.
  • Step 7: Verify the breaker is switched on. Some homeowners shut their AC breaker off as part of their winterization process. If your AC won’t turn on, check your electrical panel before assuming that something is wrong with your unit. 

Signs Your AC Needs a Comfort Specialist After Winter 

If your AC is not working after winter in Colorado, you can troubleshoot by monitoring it for the following common signs and symptoms.

  • Short Cycling: Short cycling is when a unit turns on and off more rapidly than it should. An AC that short cycles may have a faulty component or a dirty filter. Alternatively, this could occur if the AC is oversized. While you can troubleshoot by replacing a filter, faulty components and oversized systems must be addressed by a professional.
  • The AC Blows Warm Air: Sometimes, an AC will turn on and only blow warm air. This problem is likely due to compressor issues, airflow restrictions, a refrigerant leak, or a thermostat problem. You can troubleshoot by making sure the AC is set to the appropriate temperature and cooling mode. If this doesn’t fix your problem, you’ll need to call in an expert.
  • Pooling Water: If there is water pooling around the indoor unit, the condensate drain line is likely clogged. You can try flushing it with vinegar. Alternatively, our team also has professional tools that can remove stubborn clogs.
  • The AC Won’t Turn On: This can occur if there is a failed capacitor, electrical connection, or contactor. These problems can only be diagnosed and repaired by a professional.
  • Unusual Odors: While musty odors mean there is likely mold in your drain pan or ductwork, a burning odor stems from electrical components. In all of these circumstances, you should schedule repairs with a licensed technician.

What a Professional Spring AC Tune-Up Includes 

Besides your routine maintenance tasks, you should also plan for your spring AC tune-up in Denver and Littleton. During our professional inspection, we will carry out the following tasks.

  • We will check refrigerant levels and adjust them as needed.
  • Our technicians will tighten and test your electrical connections. 
  • The evaporator and condenser coils will be cleaned.
  • We’ll measure the airflow across your supply and return vents.
  • Your thermostat will be calibrated. Then, we’ll double-check that it is programmed properly.
  • Our technicians will flush the condensate drain line.
  • We’ll perform final safety and performance checks before we leave.

At Elkhorn, we won’t just sell you on a service. Our team is committed to providing upfront pricing and honest advice. If an emergency strikes, our same-day services have you covered.

Common Spring AC Issues in the Denver Metro 

When it comes to HVAC spring maintenance in the Denver metro area, there are a few local factors you must work against.

  • Elevation: We’re about 5,280 feet in elevation, which means more intense UV degradation on your unit’s outdoor components. Prompt maintenance can help you catch this issue before the component fails.
  • Dry Climate: Due to our dry climate, we often get more dust in our ductwork and air filters. In addition to changing air filters and vacuuming ducts, you can alleviate this problem with the help of an air purifier. Air purifiers are also important add-ons to have during wildfire season.
  • Temperature Swings: Spring days can vary from 80°F during the day to 30°F at night. In response, your HVAC system has to shift between heating and cooling during the same 24-hour window.
  • Hail Damage: During summer storms, hail can dent condenser fans and cause hidden damage to your outdoor unit.
  • Aging Ductwork: Englewood, Littleton, and South Denver suburbs have homes that were built between the 1970s and 1990s. As a result, these properties often have aging ductwork that reduces AC performance.

Smart Thermostat Tips for the Heating-to-Cooling Transition 

Whether you have ductless mini-splits, a heat pump, or an air conditioner, the right thermostat settings can help you stay comfortable without spending a significant amount on energy costs. During the spring transition, we recommend using auto mode so that your thermostat can automatically switch between heating and cooling. If your thermostat can’t do this, it’s time to consider a new installation. 

For the best energy efficiency, consider your dead band. The dead band is the difference between your heating and cooling set points. Typically, 3°F to 5°F is a good gap for staying comfortable without causing the unit to short cycle. You should adjust this set point for the day and night so that your home is ready for Colorado’s drastic temperature swings.

FAQs

Is it too early to turn on my AC in spring? 

Absolutely not. Your HVAC exists to keep you as comfortable as possible. Your AC doesn’t know what month it is. If you are uncomfortably hot, switch it on. However, don’t forget to complete your AC maintenance beforehand.

How long should I wait after turning on the AC to know if it’s working? 

As part of your AC maintenance before summer in Denver, you should always test out your AC to see if it is working properly. Once you switch it on, wait 15 to 20 minutes to see if it will reach the appropriate temperature. If it doesn’t, you should schedule AC repairs

Should I get a tune-up even if my AC seems fine? 

Absolutely. Preventive maintenance is essential for spotting minor problems before they escalate into major emergencies. HVAC systems are more likely to break during periods of intense usage, so a tune-up today can help you avoid an AC failure on the hottest days of the year.

Get Your AC Ready for Summer

Through our Whole Home Comfort Plan, residents can receive annual tune-ups, priority scheduling, and special discounts. If you’re struggling to wrap up your spring AC maintenance checklist in Denver, we can help. Beat the summer rush by scheduling your spring AC tune-up today.

Call Elkhorn Heating, Air Conditioning, Plumbing & Electrical for professional diagnostics, an annual tune-up, and proactive repairs.